
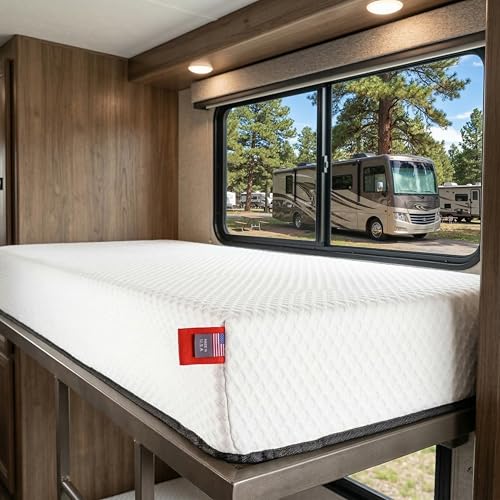
How to Replace the Mattress in Your RV Bunk Bed
You’ve hit on a classic RV puzzle: factory bunks often come with oddly sized, flimsy mattresses that ruin sleep. Here’s your fix. First, meticulously measure your bunk’s interior frame, not the old mattress, since RVs are rarely square. You’ll likely need a custom-cut foam mattress—aim for a 6-8 inch profile and a dense foam (over 4 lbs for memory foam) for proper support without exceeding weight limits. Then, install it on a stable platform, ensuring you’ve got enough headroom. Stick with me to navigate each step smoothly.
Why Your RV Bunk Mattress Needs an Upgrade
Now, your body feels the real proof. You might mistake morning soreness for travel fatigue. Those are BodyDiscomfort indicators. Your spine strains on a dipped surface, and your shoulders get no real support. You’re sleeping, but not resting. For lasting comfort and proper support, considering the mattress firmness best suited for your sleeping position is crucial. Choosing a space-saving low-profile mattress designed for RV weight limits and road durability is essential, much like selecting a mattress for a Murphy bed where lightweight hybrid models can offer an ideal blend of support and easy handling.
Here’s your takeaway: that factory mattress isn’t built for recovery. Recognizing these signs is your first step toward better sleep on the road. So, what should you look for in a replacement?
How to Measure Your RV Bunk for a Perfect Fit
Now, measure the inside frame, not the mattress. Get length and width in multiple spots, as RVs aren’t always square. When measuring, remember that personal comfort preferences, like needing extra length for a taller sleeper, should also be considered in your final choice. Note any cut-outs for bedposts or radius corners precisely. Standard sizes like a twin-over-twin can help you understand typical frame dimensions, but your RV’s specific platform is what matters.
Finally, measure for thickness, typically 4-6 inches for bunks, and double-check ceiling clearance, ensuring you maintain the recommended adequate headroom and structural stability. Re-measure everything once more. Your perfect fit comes from these careful platform dimensions, so record every detail before you even think about shopping.

Designed for RVs, Campers & Travel Trailers : Built to fit RVs, motorhomes, campers, and travel trailers. Ideal for RV bunk beds, narrow frames, cots, and compact camper sleeping areas.

Comfort Core Support System: Designed to provide balanced support and proper alignment so you can unwind fully and wake up feeling refreshed and ready for the day.

Custom Fit for RV Corner Bunk Layouts: designed specifically for RV corner bunk bed layouts, this mattress measures 51" x 74" x 4" and features a 22" diagonal right corner cut; The corner-cut design helps maximize usable space while improving access in compact sleeping areas; Ideal for many campers, travel trailers, fifth wheels, and motorhomes where space-saving bunk configurations require a corner-cut mattress
Where to Buy Your RV Bunk Mattress
After measuring your RV’s bunk platform, the natural next question is where to actually find a mattress to fit those unique dimensions. You’ll find several specialized online retailers. Before finalizing your purchase, it’s also wise to review the bunk structure’s weight limits and ensure it can safely support the new mattress and its occupants, considering that standard weight capacities for such beds often range from 200 to 250 pounds per sleeper. For long-term sturdiness, also evaluate the frame construction of your RV’s existing bunk bed. Consider retailer comparisons carefully. Brands like Magic Sleeper and Wilderness RV Mattress offer direct shipping. Others, like RV Discount Mattress and Foamite, excel at fully custom sizes. You typically provide your exact dimensions. Reading online reviews is vital for gauging real-world comfort and customer service experiences before you commit. These often detail shipping accuracy and lead times, which vary from a few days to two weeks.
Your best sources are dedicated RV mattress companies. They understand your space constraints. This simplifies finding your perfect fit.

Ultra Soft & Breathable: Our cot fitted sheet is thoughtfully designed using high-quality microfiber, which is breathable, stretchy and silky soft, friendly to kid’s sensitive skin, providing your little ones a safe and comfy sleeping environment.

Ultra Soft & Breathable: Our cot size sheets are thoughtfully designed using high-quality microfiber, which is breathable, stretchy and silky soft, friendly to kid’s sensitive skin, providing your little ones a safe and comfy sleeping environment.

Made in America: All our products are proudly made in the USA!
How to Choose the Right RV Bunk Mattress Replacement
You’ve got your measurements and know where to shop, so let’s figure out which mattress actually fits your bunk and your needs. First, confirm your maximum height—six to eight inches is standard to fit low-clearance spaces, but ensure you leave enough room for comfortable movement and bedding, considering adequate edge support for safety. Similar to selecting a mattress for a Murphy bed installation, low-profile designs are essential to prevent interference with the folding mechanism. Properly securing the mattress to the bunk platform is also crucial for safe travel.
Now, prioritize foam density. A density of 2.0 lbs per cubic foot or above guarantees durability, unlike cheaper polyfoam that wears quickly. For memory foam specifically, verify a density of 3-4 pounds for optimal longevity and support. Mattress weight is also key; lighter options help you stay within RV weight limits.
Next, consider material. Gel memory foam sleeps cooler. Latex offers hypoallergenic benefits. You’ll balance these qualities with your space and budget constraints. Your final choice should support both your body and your travel lifestyle. Ready to learn how to handle a custom shape?

SIX SIDED ZIPPERED ENCASEMENT - Completely encases your mattress on all sides. Our premium zippered encasements are equipped with a Velcro zipper seal to ensure that nothing gets in! Say good-bye to troublesome pets that can ruin your mattress and bring discomfort to your life. Take precaution and sleep worry-free knowing that your mattress is shielded and protected. Be smart and protect your investment with a quality mattress encasement!

CONTOURING COMFORT: 4 inches of high-density base foam are topped with an inch of comfortable, gel-infused memory foam for a supportive, firm mattress that’s great for stomach or back sleepers
BUNK-READY COMFORT – THE ULTIMATE UPGRADE: High comfort, adaptive support, and breathable. Designed with 2" of new AquaSoft Memory foam for optimal pressure distribution and a 4" high-density foam base for long-lasting structural stability. This 6" mattress is engineered for maximum comfort and durability in tight RV and camper bunks. Enjoy home-like sleep on every road trip without the bulk of a standard mattress.
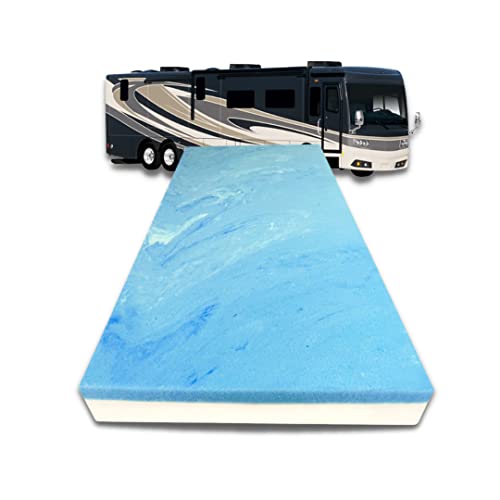
Step-by-Step Guide to Cutting Your RV Bunk Foam
Since you know which foam you need, it’s time to tackle the surprisingly simple task of cutting it to fit. First, remove any fabric encasement with a seam ripper to expose the bare foam. To access the zipper, locate the end with the bump, cut the fabric, and break the internal mechanism with pliers mattress zipper removal. Always clear the area before starting your project to ensure safety and prevent trips.
How do you mark it accurately?
Now, measure your bunk precisely. Use a straight edge and a Sharpie to mark cutting lines on all four sides. Double-check those lines. For a neat and space-saving storage solution afterward, consider folding techniques for compact beds. For storing your RV linens, adopt organized sheet storage to maximize your limited space.
What’s the best way to cut?
Raise the foam on supports for better knife clearance—this is basic workshop ergonomics. Use a long serrated knife. Saw slowly, keeping the blade perpendicular. Align with your bottom marks by peeking underneath.
Minor imperfections are fine. For large offcuts, consider foam recycling. Test the fit in your bunk right away to see if it works.

✔【3-IN-1 STYROFOAM CUTTERS】Cut or engrave foam complete tool set. GOCHANGE 3 in1 foam cutter includes 18W power adapter, 12cm & 7cm wand style hot knife, 18cm bow hot blade, 10m replacement wire for bow, and cutter holder. Whether you are a DIY enthusiast, crafter or artist, the three different cutting wands can meet your needs.
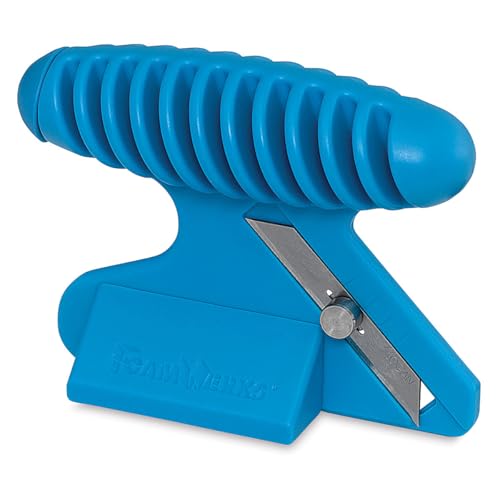
Economy and versatility combined in the Foam Werks Foam board Straight/Bevel Cutter
USE FOR A VARIETY OF PROJECTS: Foam is not just for sofas and chairs! It can be customized to repair worn down chairs, create custom cushions for patio chairs and benches, ottomans, stools, headboards, RVs, boat seats, car seats, golf cart seats, workout benches, cots, window seats, restore vintage furniture, foam mattress toppers and carrying cases for delicate glass or ceramic items, packing foam for delicate glass or ceramic items, accent pillows and many other crafts and DIY projects
How to Install Your New RV Bunk Mattress
Start with careful preparation. Confirm the bunk’s interior dimensions, guaranteeing your foam thickness won’t hit protective side rails. You should target about 24 inches of clearance above the mattress top, which is especially important given that many RV bunks use a twin-over-twin configuration. Inserting the Foam into Its Cover
Now, your cover selection and fabric materials matter. Lay the cover flat, open seam facing you. Gently slide your foam inside, carefully working it into each corner. You’re just getting it into position. For optimal durability in a shared space, consider materials used in home bunk beds like solid wood frames. Final Positioning and Securing
Here’s the thing: reach inside to push the foam fully into place. Stuff both layers into a single zippered fitted sheet to hold them together as one unit. Verify it’s snug with no fabric bunching. Finally, zip or sew the seam closed—that temporary cover becomes a permanent, custom mattress. Testing the Fit in Your RV
Place it on the plywood platform. Confirm it fits the frame and leaves you enough headroom. When testing stability, also verify the final setup does not exceed the bed’s weight capacity for safety. A good installation means your foam is now a secure, comfortable mattress ready for its first night.

Waterproof Protection - TPU membrane coating on the reverse side of the top layer effectively repels liquids, preventing any penetration to keep the mattress clean and dry.

Soft Bamboo Viscose & Polyester Terry ¨C Combines breathable bamboo viscose with durable polyester for a plush, skin-friendly feel. Wicks away excess moisture to keep you cool and dry overnight, while the terry texture adds extra comfort without feeling bulky.

Waterproof The back is coated with advanced waterproof membrane, which will protect your mattress from all kind of liquids, prolonging the life of your mattress
How to Care for Your RV Bunk Mattress to Prevent Sagging
You’re wondering how to keep that new bunk mattress from sagging, which is a smart question. Your first move is consistent mattress rotation. Flip it over every six months and rotate it head-to-foot every two to three. This prevents permanent impressions.
Next, focus on humidity control. Use a breathable, waterproof mattress protector as a shield. For the bunk platform, consider a moisture barrier. This creates vital airflow underneath. Run your air conditioning or a fan while traveling. It regulates the damp air that leads to mold and internal breakdown.
Also, check that bunk’s support. Flimsy slats guarantee early sagging. Reinforce them if needed, ensuring they meet the manufacturer’s recommended spacing for proper weight distribution and durability. Always check the manufacturer’s specifications for the bunk’s load‑bearing capacity to avoid overloading. Finally, inspect your mattress every season. Catching a soft spot early saves the whole mattress. Start with that rotation schedule today.