
Build a Murphy Bed From Scratch Without a Kit
You’re wondering how to build a Murphy bed without a kit—a smart move, as it saves thousands and gives you total design control. Start by planning: a queen bed needs a wall cavity 84-89 inches tall. You’ll build a rugged 2×4 and plywood frame, anchor it securely into wall studs, and install specialized hinges for a smooth, safe fold. Your result is a custom, rock-solid solution that perfectly fits your space, and the details on how to get there are straightforward once you know the key steps.
Plan Your Murphy Bed: Dimensions and Materials List
Before you can build anything, you need to know exactly what size bed you’re dealing with, since a Murphy bed’s dimensions dictate your whole project. Start your dimension planning by choosing vertical or horizontal orientation; a vertical queen needs an 84-89 inch tall wall cavity, while a horizontal one needs about 66-70 inches of height but more wall width. You must measure your room’s ceiling height and floor projection space, too—don’t forget to add a few inches for clearance above the bed. The standard bed sizes like queen (60×80 in) directly determine the required dimensions for your wall‑mounted frame. Now, match your mattress depth to the cabinet depth; a 10-inch mattress fits a 16-inch deep frame. This precise material sourcing list comes directly from your plan. You’ll need 3/4-inch plywood for the main frame and specific lumber like 2x4s for the hinge mechanism. A successful project also requires gathering the necessary required tools before you begin cutting. Your next step is cutting these materials to your exact dimensions. A complete guide will also provide detailed diagrams and tips for customizing dimensions for a project tailored to your specific space.
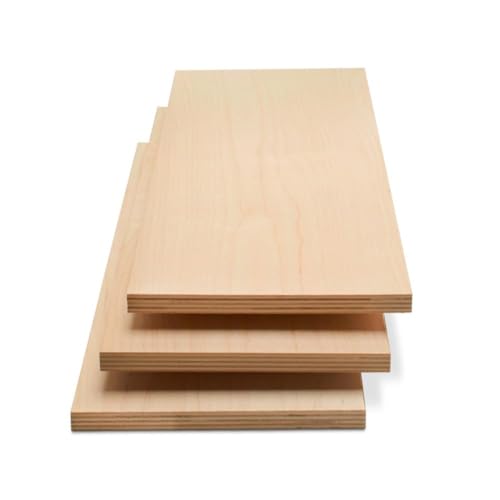
STRONG, DURABLE, HEAVY-DUTY - These craft wood pieces of multi-coated Baltic Birch plywood offer exceptional durability, rigidity, and stability for all your woodworking needs. The surfaces provide excellent holding power for glue and screws and the birch edges create cleaner joinery.

Higher quality plywood, uses no fillers or softwood

【Dual Functionalit】Bed & Storage Cabinet, maximize your space effortlessly with our Murphy bed's dual functionality. Use it as storage cabinets when folded, or unfold it into a comfortable bed when needed, ensuring clutter-free spaces
Build and Anchor the Wall Frame
While it might seem like you’re just building a cabinet, constructing a sturdy wall frame is what keeps your Murphy bed safely anchored when it’s stored upright. Your wall preparation starts by locating at least two studs behind the header with a stud finder. Mark their positions on your upper bed brace. Now, predrill pilot holes through that brace and drive in 2.5-inch wood screws. This proper load distribution transfers the bed’s weight directly into the house’s skeleton, not just the drywall. Think of it like anchoring a bookshelf—failure means a crash. The total cost of a Murphy bed project can vary significantly, but a key factor is whether you handle the professional installation yourself or hire it out. Ensure a 1/2-inch space underneath the header board by using scrap wood spacers during assembly before fastening it securely to prevent any tipping. To troubleshoot future issues, having the correct hardware and tools on hand from the start is essential. For long-term stability, plan for periodic anchor inspection to ensure all connections remain secure over time. Your next step? Adding the final supports inside the cabinet for smooth operation.
Assemble the Murphy Bed Platform Box
Build the rectangular 2×4 frame first. Now screw the plywood top and bottom directly onto it. Use two-and-a-half-inch screws for a superior and rugged hold into the frame. Add 1×4 cross-supports inside for rigidity, spacing them evenly. Secure every joint with 2-inch corner braces. Throughout construction, frequently check your measurements with a level and measuring tape to ensure the frame remains square and true. For a professional finish, carefully sand all surfaces before applying paint or sealant. Be sure to account for any wiring for lighting in your initial design if you plan to incorporate built-in features.
The takeaway: A square, rigid box is your goal. Verify the mattress fits snugly before proceeding. This solid foundation is what your folding mechanism will later attach to, and it must be anchored securely to the wall studs for safety.

【Multi-Functional Space-Saving Wall Bed Frame】This versatile Murphy bed folds completely away into a sleek cabinet, instantly opening up valuable floor space in any room, when folded, maintaining a neat, uncluttered wall appearance without bulky protruding bed frames

【Multi-Functional Space-Saving Wall Bed Frame】This versatile Murphy bed folds completely away into a sleek cabinet, instantly opening up valuable floor space in any room, when folded, maintaining a neat, uncluttered wall appearance without bulky protruding bed frames

【Space-Saving Wall Bed Design】This full size murphy bed folds away into a stylish cabinet, opening up floor space in any room. Perfect for multi-use guest rooms, home offices, or home gyms, this wall bed transforms your space from day to night effortlessly. The hideaway design maximizes square footage while maintaining a clean, organized look that complements any interior.
Install the Hinges for a Smooth Folding Action
Because those hinges seem intimidating, getting them right is actually about one key move: drilling oversized pilot holes. You’ll use a 3/8-inch Forstner bit. This gives you vital alignment flexibility.
Clamp a wood block behind to prevent tear-out. Position your bracket over these larger holes. Let it self-align as you drive in the first washer-head screws. Check for full contact without binding.
For easier handling, employ spring removal techniques before mounting. Unhook and set them aside. After the hinge is bolted to the frame and platform, reinstall the springs carefully. Finally, consider hinge lubrication tips for a silent operation. Test the empty hinge’s motion. Once the springs are hooked back, your bed should fold with smooth, assisted action. Always secure the bed to the wall studs using proper anchoring hardware to prevent tipping hazards. The pivoting vertical action of a Murphy bed requires substantial structural support to safely bear the bed’s weight when folded and unfolded. It is crucial to calculate the total bed weight of occupants and bedding to ensure your wall and frame can safely support it.
Now, you’re ready to anchor it all safely to the wall.

【Top Material】Our forstner drill bits made from high quality ASTM 5140 Steel, solid hardened steel body, ensuring its high hardness, rust proof and and long lasting sharpness.

Precision Drilling - Ideal for creating straight, angled, and overlapping holes in all wood types, enhancing your project's versatility and precision.

Size:Drilling diameter:3/8"(φ9.5),Round Shank Dia:1/3"|8mm.
Secure the Bed: Safety Anchors and Latches
You’re smart to ask, as this step stops the whole cabinet from tipping forward. Now, you must anchor into solid wood. Use a stud finder to mark the center of at least three studs for your L-brackets. Here’s the thing: Anchor Compatibility is vital. For masonry, use sleeve anchors, and for hollow drywall without studs, choose heavy-duty toggle bolts rated for 300 lbs. All right, secure those brackets tightly. Cabinet mounting must avoid hitting electrical wiring or plumbing during this installation.
Next, you’ll add a positive latching system. This requires fine-tuning the Latch Adjustment so the bed locks firmly upright against the cabinet. For a truly integrated look, you should also consider how your chosen design styles complement your small-room decor. For added stability, you can apply a non-slip furniture pad between the cabinet and the wall. Test this repeatedly. The goal is zero wiggle when closed. Your final check? Verify everything is rock-solid before trusting it with weight. Comparing user experiences on manufacturer forums can provide valuable real-world insights on hardware performance.

Toggle anchor installs behind 3/8"- to 3-5/8"-thick hollow materials including gypsum board, drywall, and concrete block to provide a secure hold from within the mounting material

8 Heavy Duty Zinc Plated Toggle Straps & 8 High Strength Carbon Steel Threaded Studs for a complete, Corrosion Resistant Master Toggle Kit to tackle your home projects

Toggle bolts quantity:100pcs(25sets)1/8 inch-13pcs Toggle Bolt,13pcs Wing Nut,13pcs nuts ,13pcs spacers. 3/16 inch-8pcs Toggle Bolt,8pcs Wing Nut,8pcs nuts ,8pcs spacers. 1/4 inch-4pcs Toggle Bolt,4pcs Wing Nut,4pcs nuts ,4pcs spacers. After installation, the wall is neat and beautiful.Different sizes and enough quantities can meet your different needs in your daily life.
Finish Your Murphy Bed: Caulking, Painting, and Headboard
Having tackled the security hardware, you might wonder how to get that seamless, built-in look—that’s where caulk and finishing nail filler transform your project from homemade to professional. This space-maximizing solution, perfected for small urban apartments, traces its roots to William L. Murphy’s original patented design, which has evolved into a key element of the modern tiny‑house movement.
What’s the best caulking tool selection?
Use a caulk gun with a built-in cutter, and for best results, choose a dripless caulk gun for its automatic stop mechanism and easier use. Cut the nozzle tip at a 45-degree angle. For smoothing, you can’t beat a baby wipe on your finger—it prevents sticking and picks up excess perfectly. This same focus on a wrinkle‑free finish is crucial for keeping your bed’s linens neat when it’s stowed away.
How do paint types factor in?
Caulk everything first, then prime. Acrylic caulk accepts paint beautifully. This sequence lets a single finishing coat cover uniformly for that flawless cabinet appearance. Now your bed looks built-in, not just built.

Dripless solution: The ETS3000 Ergotech composite caulk gun helps save time, money and effort. Professionals trust the Dripless 18:1 thrust ratio 10oz gun for its durability and reliability.

Ultimate no drip control: Caulking gun features a 360° rotatable barrel and one-touch drip-free switch, ensuring zero mess with medium/high viscosity sealants. Built-in spout cutter and puncture pin enable seamless material flow control – no accidental drips even when inverted
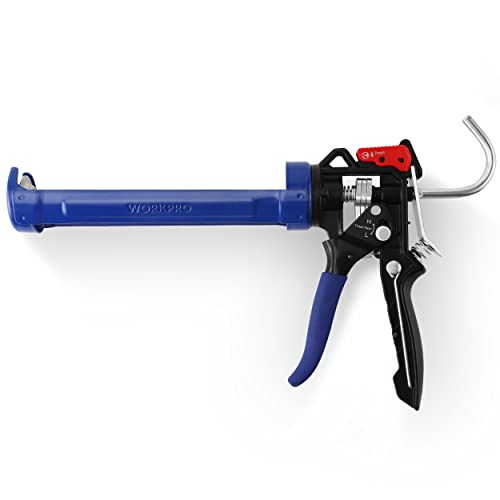
Switch at Will of High & Low Flow Rates: WORKPRO caulking gun allows for switching between high and low flow rates. Pull the trigger handle downwards, the high setting thrust ratio 18:1 for use with adhesive materials. Push the trigger handle upwards, the low setting of thrust ratio 9:1 for use with acrylic materials
How to Test the Mechanism and Use It Safely
Now that your Murphy bed looks like a built-in cabinet, you’re probably wondering, “Okay, but how do I know it’s actually safe to use?” That’s exactly the right question.
First, you must verify mechanism safety. Align, level, and test everything before use. Tighten all hinges and bolts. Check that springs or pistons move smoothly without sticking. You’ll also need to anchor it securely to your wall framing. For a spring-loaded mechanism, ensure the safety cover plate is properly installed to prevent access to the tensioned springs.
For test reliability, mimic a professional cycle test. Open and close the bed dozens of times yourself. Apply weight to the frame to test stability. This proves your system won’t sag or bind. Obviously, don’t skip this step. This final process is critical, similar to conducting a final safety inspection on any DIY furniture. Proper testing ensures the spring or piston counterbalance system reliably supports the bed’s weight.
Your final check? Confirm nothing catches and the operation is quiet and controlled. Then you can confidently use it.
Why a DIY Murphy Bed Beats a Store-Bought Kit?
Although you might assume a pre-built kit is easier, building a Murphy bed yourself often delivers better value and a superior result. You’ll save thousands, especially on king sizes, by sourcing your own plywood and hardware. It costs half the price of ready-made. You also avoid installer fees.
Beyond savings, you gain total freedom. You control the quality and design, unlike restrictive factory comparisons. You aren’t limited by brand reliability or mediocre materials. You can integrate shelves or match your room exactly.
Ultimately, you achieve a stronger bed on your own schedule. You build skills and final pride. The process gives you complete independence from shipping delays or third-party issues. It’s your project, built to your standards. You’ll know every detail is right.