How to Build a DIY IKEA Murphy Bed
You’re wondering how to start a DIY IKEA Murphy bed, which cleverly combines PAX wardrobes with a hardware kit. The process involves choosing a heavy-duty mechanism (kits cost $300-$500+), using cabinets like building blocks, and making precise cuts. You’ll then assemble the frame, install the hardware, and finish with critical safety checks. Get your circular saw ready, because nailing the measurements is your first real step.
How to Choose the Right Murphy Bed Hardware Kit
Choosing the right Murphy bed hardware kit can feel overwhelming, but you’ve started with the most essential question. You’ll primarily choose between mechanism-only kits and total DIY kits. Mechanism-only kits, like the $299 Wallbeds P-100, provide pistons and hardware. You’ll build the frame yourself. Total DIY kits include the frame and cost roughly double. That’s your first major price analysis point. Note that many of these third-party kits are designed to be paired with IKEA furniture pieces for a more integrated look.
Now, dig into kit comparisons. Create-A-Bed’s Deluxe mechanism runs $300-$500, while a full Murphy Beds hardware set can hit $1046. You’re weighing cost against convenience. A complete kit saves build time. A mechanism-only kit demands more skill but offers customization. Your mattress size and weight directly dictate which specific kit components you need. Remember to factor in professional installation fees if you decide to hire help for complex steps. During assembly, a clamp-assisted screw method can help securely attach sideboards. Start your search by honestly evaluating your woodworking ability and budget, and always perform final safety checks before using the bed.

🛏️【Complete Queen-Vertical Murphy Bed Kit】Finished size reference: 87-1/8-inch H x 65-7/8- inch W x 15-7/8- inch D (closed) x 87 inches deep (open).A complete Murphy bed queen hardware kit can easily mount your cabinet folding bed on the wall and save space for your guest room & living room.

TIME TESTED: Our kits have stood the test of time for over 35 years. If you’re going to build a high-quality murphy bed, you want it to last a lifetime. American-made steel, labor, and support are behind each kit.

𝐂𝐎𝐌𝐏𝐋𝐄𝐓𝐄 𝐌𝐔𝐑𝐏𝐇𝐘 𝐁𝐄𝐃 𝐇𝐀𝐑𝐃𝐖𝐀𝐑𝐄 𝐒𝐘𝐒𝐓𝐄𝐌 — WHAT’S IN THE KIT — Includes gas piston lift system (smooth open/close rated for daily use), patented 2-in-1 auto-locking stainless steel pivot plates, heavy-duty square tube folding legs, quick-release mattress retention strap, all mounting hardware and fasteners, plus 3 fully illustrated guidebooks (Cut List Guide, Construction Guide, Assembly Handbook). No separate hardware store runs needed for the mechanical components.
Sourcing IKEA Cabinets and Materials for Your Build
Okay, you’re looking at the IKEA aisle and wondering how all these PAX wardrobes turn into a solid Murphy bed frame—the secret is treating them like industrial Lego bricks for your built-in foundation. You’ll combine two or three 100cm-wide PAX cabinets to get your 160cm minimum width. You source the doors and hardware separately; four standard-sized hinged doors or two sets of Lyngdal sliding doors will complete the look without custom costs. While cabinet painting usually isn’t needed, your material finishing touches are key—use dark-brown edging tape for exposed particle board. Remember, you’re also grabbing Komplement organizers, a closet rod, and LED strips for final functionality. Your total IKEA haul will likely hit around $1,000 before your hardware kit, positioning it as a budget DIY kit. The pivotal mechanism and lifting hardware must be sourced separately to ensure a smooth folding motion and safety, so carefully follow the manufacturer’s instructions for installing the folding mechanism to guarantee correct alignment and secure mounting.

PRACTICAL- store your bed in style. With the Milliard Storage Closet you can enjoy the luxury and comfort of a twin/cot size folding bed, without compromising on your space. Roll out your folding bed when additional sleep space is necessary, fold and neatly stow in the Milliard Storage Closet when it is no longer required.

【Dual Functionalit】Bed & Storage Cabinet, maximize your space effortlessly with our Murphy bed's dual functionality. Use it as storage cabinets when folded, or unfold it into a comfortable bed when needed, ensuring clutter-free spaces

【2-in-1 Multifunctional Bed】Murphy cabinet bed easily transforms between a comfortable bed and a sleek cabinet, maximizing space. Ideal for apartments, guest rooms, and multifunctional living areas
Modifying and Cutting Parts With Precision
Anyone who’s stared at a pile of lumber knows cutting it can feel overwhelming, but that’s where the real magic happens. You’ll rely heavily on circular saws with a straight board guide for long cuts. Your cut quality depends on good measurement techniques, like using a sliding ruler and accounting for the blade’s offset from that guide. Template creation is your best friend for consistency, especially for rounded edges on parts like the bed sides. Use the paper templates from your plans. Transfer those lines onto masking tape applied over melamine to prevent ugly scratches. Now, drill your hardware holes. Use an awl to mark the exact center every time. This prevents the drill bit from wandering and ruining your part’s alignment. Sharp corners? Round them off with a jigsaw for safety. Your precision here guarantees everything fits together perfectly later. Always consult your kit’s specific assembly guide to ensure you are preparing the parts correctly. When working from a cutting guide, be sure to use the correct color-coded list for your chosen material, such as particle board or plywood. Don’t forget to give all your freshly cut pieces a thorough final safety inspection before moving on to assembly. Properly reinforcing the support beams is crucial for the long-term stability and safety of the structure.

Powerful 15-amp motor delivers 5 300-RPM for greater speed and faster cuts

Eliminate need for marking, measuring, and layout lines
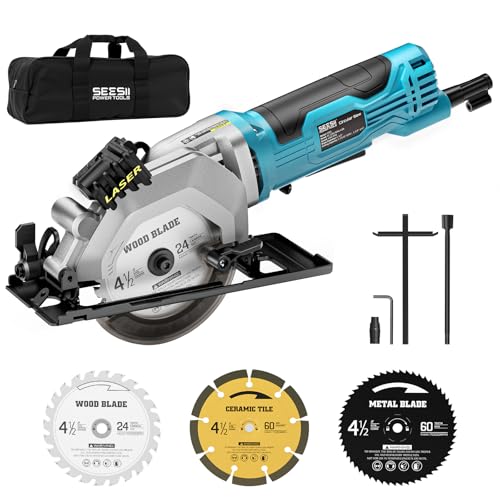
Power corded circular saw:The corded circular saw is equipped with 4.8 Amps motor delivering a no load speed up to 4000 RPM.Compared with general mini circular saws,it has a 20% increase in cutting efficiency, which is suitable for home renovation, furniture making, and handmade projects, etc
Assembling the Murphy Bed Frame and Cabinet Structure
Next, you’ll attach the IKEA cabinet’s side panels using its provided bolts. Raise the crown piece with help, securing it with 5/8″ screws. Obviously, you need a partner to lift the frame vertically before final bolting. When tightening all connection points, ensure you tighten the nuts uniformly to create a firm, secure foundation. Before proceeding, conduct a wall reinforcement check to confirm your mounting surface can support the bed’s dynamic load. For a reliable installation, it is critical to locate wall studs for the strongest anchor points. Always follow the manufacturer’s instructions to mitigate risks from improper installation.
Your structure is now a solid box. This integrated frame and cabinet is your foundation for the mechanism.

【SUPERIOR REBOUND FORCE】- One person can freely fold out or up the bed. Inside 5 premium springs, high rebound strength to ensure the whole process.

Horizontal Mount Queen Size Full Size Twin size Deluxe Murphy Bed Hardware Kit(for the small size bed,just reduce the springs in the housing if they are too strong)
【SUPERIOR REBOUND FORCE】- One person can freely fold out or up the bed. Inside 9 premium springs, high rebound strength to ensure the whole process.
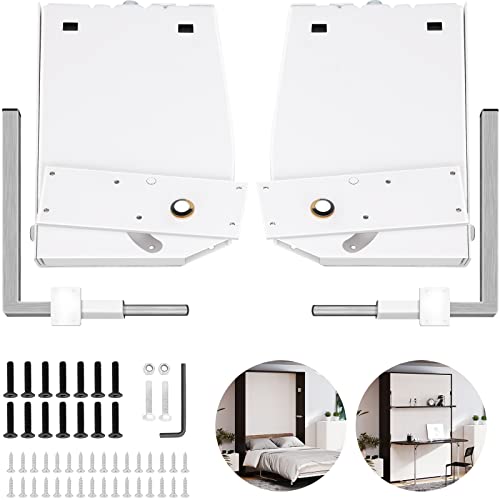
Installing the Hardware for Safe, Smooth Operation
With all the confusion around hardware kits, you’re smart to focus here—it’s the essential interface between your cabinet and the moving bed frame. Start by precisely placing the lower ball stud plates on your B-cut plywood pieces; these anchor points are critical. Now, drill your pivot holes with a ⅝” Forstner bit, stopping before you drill fully through. Follow your template exactly.
Here’s the thing: proper piston alignment comes last. You’ll only attach the pistons after confirming the frame swings smoothly. Misalignment strains the entire system. Install the upper hardware—your male pivot plate and upper ball stud plates—per your kit’s instructions, using a clamp for stability. Your goal is a perfect mechanical interface, so every measurement matters for safe operation. The wall unit must provide adequate structural support for the bed’s weight and movement to prevent failure. Always verify the kit’s specified load capacity to ensure it matches your mattress and bedding weight. Before any disassembly, always remove the mattress and clear the surrounding area for safety. Lubricate the top and bottom mechanism bearings with WD40 if squeaking occurs to ensure smooth movement.

EXACT FIT - Perfect replacement for IKEA Part #116791

IMPORTANT NOTE - LOOKS DIFFERENT BUT WORKS THE SAME

COMPATIBILITY: These nylon dowels and screws are fully compatible with IKEA parts 102267 and 105163, often used for attaching bed slats in bed frames such as MALM, SONGESAND, HEMNES, HASSELVIKA, and more. Be sure to check your assembly manual to confirm compatibility.
Performing the Final Safety Check and Test
Finally, confirm the bed locks securely upright every single time, ensuring the mechanism has reliable secondary safety locks. Before regular use, perform a final check of all mounting hardware and wall anchors to ensure ongoing integrity. You’ve now proven its daily safety and reliability. This final operational test also confirms your chosen model provides the necessary weight capacity and mattress compatibility for safe, long-term use.