How to Build a Loft Bed: Step-by-Step Guide
You’re in the right place to untangle how to start. First, pick your mattress size, like a 60″x80″ queen. You’ll likely need seven 2x6s and fifteen 2x4s, so plan your budget and measure your space carefully. Now, cut all your lumber, starting with the longest pieces, and sand everything smooth. Assemble the leg structures and main frame securely before installing the slatted platform. Obviously, you’ll finish with safety rails and a sturdy ladder—the details ahead make it all click.
Start With Your Loft Bed Design and Material List
Alright, so you’re thinking about building a loft bed and wondering where to even begin. You start with a design. First, pick your mattress size; your options range from a 39″x75″ twin to a 60″x80″ queen. This single choice dictates your frame’s dimensions and material needs. You’ll then build your material list around that. A common plan uses about seven 2x6x8 boards and fifteen 2x4x8 boards. Your budget planning starts with checking local lumberyard or home center material sources for these items, plus hardware like lag screws and joist hangers. You aren’t cutting anything yet—you’re just getting your blueprint and shopping list absolutely solid first. Accurately measuring the space will ensure your design fits perfectly and allows for safe movement. It is also crucial for planning the overall structural integrity and proper head clearance beneath the bed. To make the process smoother, gather essential tools like a drill, saw, and measuring tape beforehand.

By Crafters, For Crafters - Crafting and building with wood is our number one priority. Bringing you more of the wood craft supplies you love is our job. Please dont hesitate to get in touch.

【Multi-Functional Fun House Bed】-- Featuring wtih high roof, window and house design, this unique bed creates a fun and adorable space that not only serves as a comfortable sleeping area but also double as a space for your kids to study, watch TV or explore their imaginations.
Cut and Prepare All Loft Bed Components
Now that you’ve got your design and materials list sorted, let’s turn those lumber piles into actual bed parts.
First, you’ll cut everything to length. Your tool selection matters—use a miter saw for clean, square cuts on framing lumber. Start by cutting your longest pieces, like the 70-inch legs, to maximize material. This efficient cutting technique reduces waste and keeps pieces consistent. Mark each one with painter’s tape as you go.
Then, sand every piece thoroughly. Start with 120-grit paper to remove splinters, then switch to 220-grit for a smooth finish. Don’t round over the ends that will form butt joints. Always measure your mattress first and double-check your components for proper clearance to ensure the final frame accommodates your ceiling height.
Finally, organize everything. Group parts by type—legs, rails, slats—so assembly is straightforward. It is crucial to reinforce the structure by installing sturdy support brackets at key joints for long-term stability. Always consult local building codes for specific safety requirements regarding guardrails and structure. With all components prepped, you’re ready to build the structure.
Assemble the Bed Frame and Leg Structures
You might be wondering how these separate pieces become a sturdy, load-bearing structure, and it starts by building the legs and frame as two distinct units. First, construct four legs by joining a 2×6 to a 2×4 at a right angle. Marking lines on the board edges guarantees perfect biscuit placement before gluing and clamping. Drill pilot holes, then secure each leg with screws at 12-inch intervals for ideal screw spacing; you’ll want six screws per leg for stability. This is similar to reinforcing the wall for a Murphy bed mechanism.
Now, assemble the rectangular bed frame. Join your 79-inch and 54-inch 2×6 boards using glue. Drive three 4-inch screws per corner through pre-drilled holes. Use clamps for perfect 90-degree joints, creating a rigid 57×79-inch frame. The strength is in these two solid, separate units you’ll connect later. Once joined, ensure stability by tightening all tension knobs for safety, as is common in pre-fabricated loft designs. As with any major furniture build, performing thorough safety checks is a critical final step. This is also the ideal time to anchor the structure to a wall for maximum safety, especially given the elevated sleeping area.

👍【Sturdy Bed Risers 4 Inch Heavy Duty】 Our bed lifts risers are made of high quality thickened PP plastic that can hold up to 6,000 pounds and are strong enough to support any heavy furniture like bed, chair, desk, cabinet, sofa, table, TV stand for home or office. The internal mesh reinforcement design of the couch risers 4 inch heavy duty greatly increases its load-bearing capacity. The bed risers heavy duty can carry the weight of bed raisers for dorm twin xl, king size bed, queen bed, etc.

👍【Sturdy Bed Risers 2 Inch Heavy Duty】 Our bed lifts risers are made of high quality thickened PP plastic that can hold up to 6,000 pounds and are strong enough to support any heavy furniture like bed, chair, desk, cabinet, sofa, table, TV stand for home or office. The internal mesh reinforcement design of the couch risers 2 inch greatly increases its load-bearing capacity. The bed risers heavy duty can carry the weight of bed raisers for dorm twin xl, king size bed, queen bed, etc.

【Sturdy Bed Risers 8 Inch Heavy Duty】 Our bed lifts risers are made of high quality thickened PP plastic that can hold up to 6,000 pounds and are strong enough to support any heavy furniture like bed, chair, desk, cabinet, sofa, table, TV stand for home or office. The internal mesh reinforcement design of the couch risers 1 inch greatly increases its load-bearing capacity. The bed risers heavy duty can carry the weight of bed raisers for dorm twin xl, king size bed, queen bed, etc.
Install the Mattress Platform and Level the Surface
You’ve got your sturdy legs and frame ready, so let’s put a solid surface on top for your mattress.
For a slatted base, space your 1×6 slats evenly across the frame. Use the width of two slats as a handy 3-inch guide. Attach each with glue and two 1½-inch screws per end. The right slatted base for your bunk bed contributes significantly to proper weight distribution and long-term durability. Now, your platform levelling is critical. If your design uses spacer blocks, measure and attach them carefully to guarantee the frame lies perfectly flat. Here’s the thing: an unlevel surface compromises sleep and safety. Remember to also confirm your final platform height, as this directly determines the critical clearance height available underneath for comfortable use. When installing wooden slats, insert them into notches on the bed rails for secure placement. Always check your chosen design’s manufacturer specifications for precise load limits based on materials and construction.
Finally, for mattress securing, your slats or plywood sheet provide the direct support. Just place your mattress atop this completed, solid platform. Next, you’ll focus on building safe access and containment.
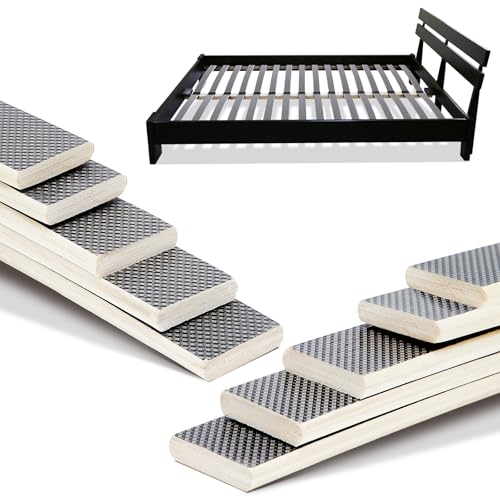
Bed Slats Replacement: you will receive 5 pieces of wooden bed slats (bed frame are not included), designed to replace broken or damaged slats, suitable for most metal bed frames; Each bed slat measures about 29.3" x 0.39" x 2" (length x thickness x width), please check the size and measure the internal width of your bed frame before ordering, you can cut it to the desired length if you need

NO MORE ROLLING OFF THE BED - ComfyBumpy bed rail for toddlers provides your child extra security without them feeling the bars under their mattress. Your toddler will sleep safely and comfortably all night long!

Bed frame twin size with rounded cylindrical of front legs to prevent bumps injuries.
Add Safety Railings, Build the Ladder, and Secure Assembly
Ready to test your bed’s stability before adding a mattress? Ensure the ladder is securely attached using metal brackets for reinforcement. When selecting your ladder style, consider whether a straight staircase offers easier access than a vertical ladder. Consider anti‑slip steps for added safety when using the ladder daily.