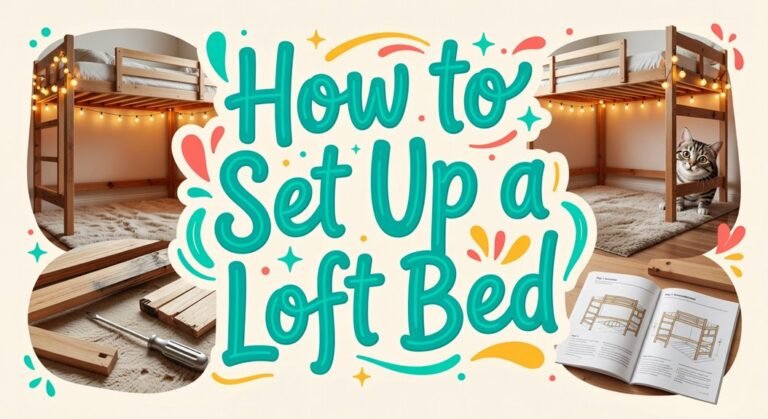
Can Bunk Beds Be Separated? A Practical Guide
You’re probably looking at a bunk bed and wondering if it can ever be two separate beds. Good news—many models from brands like Maxtrix are designed to do exactly that. They separate into two standard twin beds by removing connecting hardware like brackets and long screws. You’ll want the official guide for your specific model, but the process is straightforward once you have the right tools and instructions.
Yes, Many Bunk Beds Can Be Separated Into Twin Beds
You’ve probably spotted a bunk bed that would be perfect, but you’re wondering if you can split it later. Yes, many bunk beds can be separated into twin beds. Brands like Maxtrix, Max & Lily, and Gary Mission specifically design their twin bunk beds to detach into two standalone beds. This matters for Space Planning. It means a bunk fits a shared room now, but later, you can create two separate sleep spaces. It’s also key for Age Shift. When siblings want their own rooms, you’re ready. The separation process itself is straightforward. You typically remove connecting hardware like brackets and screws, following a simple step‑by‑step disassembly process. Often, you can swap the headboard and footboard. The final assembly relies on gravity, with no screws or bolts needed to hold the standalone beds together. When separating a twin-over-twin bunk, ensure each resulting bed maintains the standard twin mattress dimensions for proper bedding fit. Also confirm that each standalone bed meets the required weight limits and safety standards for secure, long-term use. Your takeaway: Look for models explicitly labeled as “convertible” or “separating.” That guarantees future flexibility.

CPC Certified: Tested and certified to meet US Children's Product Certificate safety standards with improved structural details for safer everyday use

【Convertible Twin Over Twin Design】This twin over twin bunk bed easily converts into two separate twin beds, adapting to your children’s growth and changing room needs. Ideal for shared bedrooms, small rooms, or multi-child households, it offers flexible sleeping solutions for growing families.

CPC Certified: Tested and certified to meet US Children's Product Certificate safety standards with improved structural details for safer everyday use
Why Convertible Bunks Are a Smart Long-Term Choice
While you’re weighing options, it’s smart to ponder how a convertible bunk bed saves money and adapts over years. Its investment flexibility is huge. You buy one piece that can be two standalone beds later. That’s cheaper than buying multiple individual beds now. It eliminates frequent furniture replacements as kids grow. You also get major family adaptability. A triple bunk converts to a stacked pair plus a single bed. You can reconfigure it for guests or to free floor space for desks. Obviously, this supports changing needs from childhood into adolescence. It’s a durable, long-term solution for dynamic living situations. Your initial decision pays off for years, making it a genuinely smart choice. Many convertible designs fall under the category of specialty bunk beds, which are engineered for multi-functionality. This versatility is especially valuable in shared spaces or small rooms where maximizing floor area is critical. Prioritizing vertical space, as with built-in models, is key in compact layouts. Now, you need the right instructions to make that conversion safely.

INCLUDES: The set includes 2 cots with head & foot to keep pillow in place, 2 carry bags for hassle-free transport, a set of stack adapters (2 in each bag) for flexible configuration, and 2 locking straps (1 in each bag) for added security.

Multi-functional metal bunk bed over convertible futon couch design. Bottom bunk can be used as a sofa or a full size bed. Perfect for kids bedrooms, dorm rooms, teens rooms or guest rooms. Futon quickly, easily and safely converts into a full size sleeper

Safe & Durable Premium Steel Construction - This 3 bed bunk bed has attribute of thickened high-grade steel that delivers lasting stability and solid build quality. It is a rigorously ASTM & CPSIA certified bunk bed, with weight capacities of 300 lbs (top Twin XL) and 600 lbs for each bottom Twin bed; this heavy-duty build will never cause structural instability or safety concerns for sleepers of all ages
Where to Find the Right Instructions for Your Bunk Bed Model
Finding clear instructions for separating your specific bunk bed model isn’t always straightforward, but you’re asking the perfect question. Your first stop is the manufacturer’s site. Companies like Max and Lily or BredaBeds provide model-specific PDFs detailing everything from reversing slat placements to removing tension springs. These guides will outline the secure hardware connections you need to locate and undo.
Check major online retailers where you bought it, as Living Spaces often links to manufacturer guides. For visual learners, search YouTube for video tutorials using your exact model name, like “BK961EL Twin over Full.” These show the exact sequence for rail and pin removal. Your model’s unique hardware determines the steps, so generic advice often fails. Start with the source material for a safe takedown. Now, once you’ve got your instructions, you’ll need to gather the right tools. Pins connect the top and bottom bed sections and must be removed carefully. Having the correct safety gear on hand, like gloves and eye protection, is also crucial before you begin disassembly. Proper disassembly ensures each standalone bed frame maintains its structural integrity and weight capacity.

THE ORIGINAL, AUTHENTIC MATTRESS LIFTER MADE IN THE USA- Many try to replicate our design but none can compete with the quality and function of the Bed Made EZ

Products Hardware Kit: This set includes M6 crib screws in 4 lengths (20mm, 40mm, 60mm, 80mm) along with matching barrel nuts and wrenches for assembling cribs, bunk beds, headboards, and other furniture.

✅【Making Bed with Ease】This sheet tucking tool helps simplify bed making. Use the bedsheet paddle to tuck your sheets tighter without having to elevate the heavy mattress, resulting in neat and clean sheets.
What Tools and Hardware You’ll Need for Separation
Now, separating a bunk bed is much like taking apart a big piece of furniture; it’s straightforward if you have the right tools. You’ll start with screwdriver selection. Grab a flathead for slotted screws and a Phillips for cross-head ones; they’re essential for guardrails and frames. As with disassembling other wall-mounted furniture, having a helper nearby can make the process safer and more efficient. You’ll also need hex key types, or Allen wrenches. These loosen the bolts connecting the bunks, and checking them periodically is a key part of regular maintenance for any bed frame. A standard set will cover it, and using the original IKEA hex key tools if available can make the process smoother. For a secure foundation before separation, using a level to check for any initial instability is a good safety practice.
Have an adjustable wrench or pliers handy for any stubborn hardware. A rubber mallet can gently loosen stuck parts. You’ll want containers and labels for all those screws and bolts so they don’t get lost, mirroring the label and organize practice used when taking apart complex assemblies. With your tools organized, you’re ready for the next step: taking it apart safely.

【PREMIUM MATERIAL】 Heat-treated steel with black-oxide finish, featuring 15 long reach keys and 15 high leverage short keys for durability and strength.

Allen wrenches (aka hex keys) for tightening or loosening screws

Locking mechanism helps stabilize keys for maximum torque delivery
How to Safely Take Your Bunk Bed Apart
Now, focus on workspace organization. Gather your tools and a container for all hardware. Work top-to-bottom, methodically removing the ladder and the long screws joining the bunks. It is crucial to ensure proper ventilation and keep your workspace clear for safety and efficiency. Track every bolt; losing them creates wobbly beds later. Before final reassembly, you should perform a final safety inspection just as you would when building a new bed frame. If you plan to reuse the original bunk-bed ladder, inspect its rung spacing and level for secure climbing.
This systematic approach takes about 30 minutes. You’ll end with two sturdy twin frames, ready for new setups. Next, you’ll need to confirm each standalone bed is perfectly stable.
Is Your Separated Bed Wobbly? Do This Stability Check
Your bunk bed’s been separated, but if it’s feeling shaky, you’re probably wondering if that’s normal or if you can fix it. Here’s the thing: a little movement might happen, but a pronounced wobble means something’s loose. This instability often stems from a design where the vertical and horizontal rails form a simple, unbraced picture frame structure that lacks rigidity.
Start with a thorough wobble inspection. Rock the bed gently at the headboard and footboard. Listen for creaks and watch where movement originates. Your first suspect is always loose hardware. Check every bolt, screw, and bracket you re-tightened during assembly. Use your wrench or Allen key and methodically secure each one. This single fix can eliminate up to 75% of the movement. This process is similar to assessing the cause of movement when a standard bed slides, where loose joints are a common culprit. Consistent maintenance of these connections is key to long-term structural integrity.
After tightening, test it again. If it’s still unsteady, your frame joints likely need reinforcement. That’s your logical step. To prevent future looseness, consider securing the bed to the wall if your bed’s design and wall allow it.
Which Mattress Size Fits Your New Standalone Bed?
How do you even choose a mattress size for your newly separated bed? You’re looking at two main mattress options: standard twin and twin XL. Both share a 38-inch width, but their length differs. Standard twin is 75 inches long. Twin XL offers an extra 5 inches, hitting 80 inches, which matches queen and king length. Consider your twin suitability. A standard twin suits children or petite adults, while a taller adult will prefer the XL. Obviously, room size matters too. You need at least 7×10 feet for a twin, and 8×10 feet for an XL. Your choice now hinges on who’s sleeping there and the available space. Pick the length that fits the person best. For optimal safety and comfort, always measure your bunk bed frame clearance against the mattress dimensions and prioritize a low-profile design for stability and easier handling.

TRADITIONAL SUPPORT, BETTER FOR THE PLANET – This reliably comfortable hybrid will provide even support night after night and arrives to you in a new smaller box that reduces its carbon footprint

【Stay Cool, Wake Refreshed】The mattress xl features an airbreeze knitted cover that enhances breathability, actively wicking away heat and moisture for a dry sleep surface. Beneath the cover, the NanoGel memory foam works throughout the night to draw excess body heat away, delivering a refreshed and cushioned feel that helps you stay asleep longer. Together, this twin xl mattress create an optimally cool environment—so you wake up feeling rejuvenated, night after night.

VENTILATED GEL FOAM: Gel-infused memory foam mattress enhances airflow and regulates temperature, helping you stay cooler and more comfortable throughout the night for deeper, uninterrupted sleep.
Room Layout Ideas for Your New Twin Beds
Since you’re figuring out how to arrange those twin beds after separating them, you’ve got plenty of clever layout options depending on your room’s shape. For a long, narrow room, push them side-by-side against a wall. Now, your zone planning gets creative in a square space. Try an L-shaped corner nook or place beds on opposite walls. Both options define personal zones while keeping a central pathway accessibility clear. You can loft one bed to free floor space or put a storage divider between them. Obviously, each layout serves different needs. Consider your room’s exact dimensions and your kids’ ages. Your next step is measuring the room and sketching these ideas to see what truly fits. For a surprisingly spacious feel, lighter wall shades can make the room feel more open and prevent it from feeling crowded.