
How to Build Bunk Beds: A Step‑by‑Step Guide
You’re wondering how to build bunk beds from scratch without missing a key safety step, and that’s exactly where to start. Your planning is essential: you’ll need an 8-foot ceiling minimum, guardrails over 5 inches above the mattress, and slat gaps under 3.5 inches. Begin by building four L-shaped leg assemblies from 2×6 and 2×4 lumber, then bolt the frame together, add slats, and always anchor it to the wall. Nail these fundamentals and the rest of the process becomes much clearer.
Plan Your Build With Key Bunk Bed Dimensions and Safety Rules
You’re probably wondering how much space this project will actually take up—obviously, dimensions and safety are the first things you need to nail down. Your space planning starts with the mattress. A Twin-over-Twin is typically 80 inches long and 42 inches wide, but a Twin-over-Full needs nearly 70 inches of width. Now, check your ceiling clearance. With a standard 65-inch-high frame, you need at least 30 inches of headspace above the top mattress. That means an eight-foot ceiling is your absolute minimum for safety and comfort. For safe ladder access and to prevent bumps, always verify the recommended guardrail height and weight limits for your design. This initial measurement phase avoids a cramped room and prevents bumps. Be sure to also review any relevant safety standards that dictate clearances and structural requirements. The overall length of your bunk bed can also vary based on the frame style and mattress thickness. So, grab your tape measure first—confirming your room can handle the bunk’s footprint and height is the non-negotiable step before you even think about lumber.
Gather Your Tools and Lumber for a Sturdy Bunk Bed Frame
Alright, you’ve figured out the space you need—now you’re probably wondering what to actually buy and what tools you’ll need to put it all together.
First, your lumber list is specific. You’ll need four 2x6x10′ boards, four 2x6x8′ boards, and several 2x4s in 8′ and 10′ lengths for the frame and posts. For lumber storage solutions, lay them flat in a garage to prevent warping before you build. Your tool selection tips start with a drill, miter saw, and pocket hole jig for strong joints. Obviously, add safety gear like goggles and a dust mask. You’ll also need wood glue, assorted screws, and a sander. For a dedicated ladder, consider using hardwood lumber for the side rails and rungs to ensure maximum durability. Gathering everything now prevents mid-project delays. After assembly, be sure to conduct a final safety inspection to ensure the structure is secure for use. Next, you’ll be ready to make all your precise cuts. When selecting your mattress platform, ensure you have materials for constructing a sturdy ladder or stairs for safe access.

Durable synthetic material, safe for use with all hull types

【Multi-Functional Fun House Bed】-- Featuring wtih high roof, window and house design, this unique bed creates a fun and adorable space that not only serves as a comfortable sleeping area but also double as a space for your kids to study, watch TV or explore their imaginations.

STURDY SUPPORT TO PREVENT SAGGING – A sagging mattress can ruin your sleep. This firm supportive bed board keeps your mattress flat and even, stopping dips and lumps before they start. Enjoy a comfortable, well-supported bed that helps you wake up feeling rested.
Cut All Lumber for the Bunk Bed Frame and Posts
Your precise cuts now set up the entire frame. The top mattress height is set at 1650mm, which determines the post lengths for the upper bunk. Ensuring your project meets established safety standards is crucial for a secure final build. Check all fasteners periodically, as worn hardware is a common cause of bunk bed failure. Remember to use a level when assembling the frame to ensure all components are properly aligned before final fastening.

UPGRADED 10MM THICKNESS FOR STRONG SUPPORT-LAVEVE Bunkie Board features an upgraded sturdy 10mm thickness, providing stable and even support for your mattress. It effectively helps solve sagging and unevenness, helping your mattress maintain firm, like-new support day after day.

Sturdy Wood Construction: Crafted from durable solid Southern Yellow Pine, these heavy-duty bed slats reinforce existing bed frames for platform beds, bunk beds and daybeds; Does NOT repair broken frames or worn-out mattresses

STURDY WOOD SLAT DESIGN - Features a 1.6-inch profile for robust support—ideal for platform beds, bunk beds, and daybeds (Dimensions: 73.8" x 53" x 1.6")
Build the Four Corner L-Shaped Leg Assemblies
Mark and drill pocket holes into the 2×4, hiding the screws inside the final assembly. Apply wood glue, align the boards perfectly perpendicular, and drive the screws home. Build four identical legs.
Reinforce each inner corner with a 45-degree brace for serious stability. Finally, mark a line 15 inches from each leg’s top; this guarantees your frame sits level later. When reassembling or moving the bed later, having a clear step-by-step guide for disassembly will ensure safety and ease. If you ever need to convert it into two separate beds, understanding the original frame construction will be crucial for a safe and sturdy result. Once the main frame is built, you will need to attach the ladder for safe access to the top bunk. Now your four sturdy corners are ready to support everything. The legs are built in an L-shaped leg assembly using a 2×4 screwed to a 2×6 for strength.

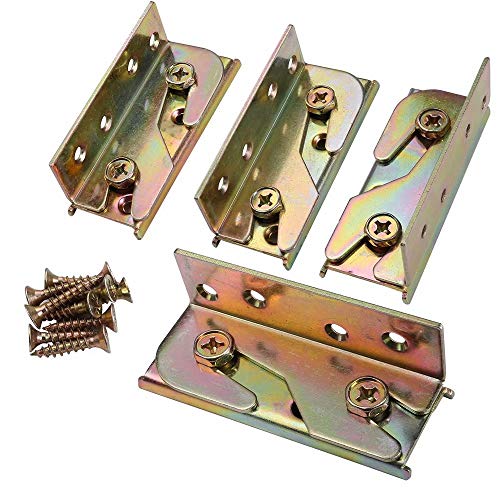
Holds up to 300 lbs per bracket

Low carbon steel flat corner braces with black powder coating finish

Material: We use stainless steel material is not easy to rust, strong resistance to pressure, not easy to deformation, and the surface is smooth and not easy to be scratched.
Assemble the Bunk Bed’s Headboard and Footboard
You’ve got your four stable leg assemblies, so what holds them together? It’s the headboard and footboard. First, identify them from your rail box. Your hardware selection is key: you’ll need bolts and nuts for the bottom holes and wooden dowels for the top. Insert two bolts through each side rail’s bottom holes into the headboard. Now, thread the nuts on back and hand-tighten. Here’s the thing: proper rail orientation is critical. The slat rails face inward toward each other on both sides. Connect the footboard the same way using four bolts per end for rock-solid stability. Finally, lightly hammer the dowel pins into the headboard’s top holes. They’ll align the top bunk later. Always consult your university policies before beginning final assembly to ensure your setup is allowed. For the lower bunk assembly, all eight bolts on the bottom frame should be tightened completely. This precise assembly is crucial for ensuring the bed meets safety standards and proper guardrail placement. When evaluating your project’s total cost, consider that the price range for a complete bed can vary significantly based on materials and features.
Takeaway: Your frame takes shape by bolting the rails securely between the headboard and footboard. Next, you’ll connect these end units to the legs.
Connect the Rails and Install the Mattress Platform
Install rails on the bottom bunks first, ensuring no gaps. Then, attach the top ones, placing the safety rail on the side away from the wall. Tighten everything to eliminate wobble. For the platform, place the mattress atop the upper bunk first. This prevents the safety rail from falling and lets its brackets hook properly around the bed frame. Lift footboard bed frame onto top of headboard bed frame to correctly position the upper structure. When using solid wood, ensure all joints are secure, as this is critical for meeting the safe weight capacity of your design. Finally, verify all four rails are firmly in place before you move on. During assembly, be sure to anchor the structure to the wall for enhanced stability. Always consult the manufacturer’s specifications to confirm your bed’s load-bearing ability and prevent overloading.

Package Contents - 2 Hooks, Screw Pack.
PURPOSE: Be widely used for wooden bed frames, bed rails, headboards, footboards, bunk bed ladders, and even other wooden furniture. These are also great for those of you who might move a lot and need a quick/ easy disassembly

NO MORE ROLLING OFF THE BED - ComfyBumpy bed rail for toddlers provides your child extra security without them feeling the bars under their mattress. Your toddler will sleep safely and comfortably all night long!
Add Wooden Slats and Secure the Mattress Base
You’ve got the frame up, but you’re wondering how to actually support the mattress. Here’s the thing: you don’t use a solid platform. Instead, you’ll install wooden slats. These distribute weight evenly and allow for vital air circulation. This method aligns with modern bunk bed alternatives that often use slatted bases instead of box springs.
Now, you need to confirm slat compatibility with your specific bunk frame. For premium rolls like Max and Lily, you must check this. Then comes spacing verification. Place them 2 to 4 inches apart. This prevents mattress sagging, and proper support is a key part of overall bunk bed safety. Standard twin slats are 1″x4″x3.25′.
Secure each slat to the side rails using rated screws or bolts. Tighten them securely to prevent movement. You’re now ready for the mattress.
Install Protective Guardrails on the Top Bunk
Even if you’re building a bunk bed against a wall, guardrails are non-negotiable for the top bunk. U.S. safety standards require them on both sides, with one full-length rail opposite the ladder. You must anchor them securely to the frame.
Check guardrail height and gaps. Your rails need a minimum five-inch height above the mattress. Measure all gaps between slats—they must be under 3.5 inches to prevent entrapment. A higher rail or low-profile mattress increases safety. For strong and hidden joints, consider using dowel joinery for assembly.
Now, consider long-term use. Some systems offer easy rail removal for changing needs, but avoid temporary rail alternatives for the top bunk. Your final step is a stability check. Tighten every bolt and confirm the mattress height doesn’t compromise your rail coverage. Next, you’ll build safe access.
Build and Attach a Stable Bunk Bed Ladder
Your key choice is ladder materials. You can craft timber sides with tenoned rungs for a classic build, or use a pre-made metal kit. Here’s the thing: after assembly, you must conduct ladder testing. Secure it firmly, then check every joint and step for solidity. Your rungs should be spaced 7-12 inches apart and have grooves to prevent slips. For a wooden ladder, notched step construction creates a very solid and secure feel during use.
Now, attach your stable ladder at a safe angle. This final installation step guarantees it’s ready for daily use before you anchor the entire bed.

【SIZE】2.75 x 1.3 x 0.78. Inside Width: 2.5cm/1inch. Package: 4pcs bunk bed hook and equipped with M3.5*14mm and M4*16mm two sets of screws(total 24pcs screws). There is no expansion screw set, and the buyer needs to buy it himself. Please check the dimensions before buying.

【SOLID WOOD MATERIAL】: Heavy duty wood bunk bed ladder made of (3/4 inch) 2 cm thick solid wood, with a non-slip surface pattern of extra-wide treads, with a non-slip, wear-resistant, waterproof, load-bearing, maximum load-bearing capacity of 660 lbs/300 kg ≈ 3 adults or 6 children standing at the same time
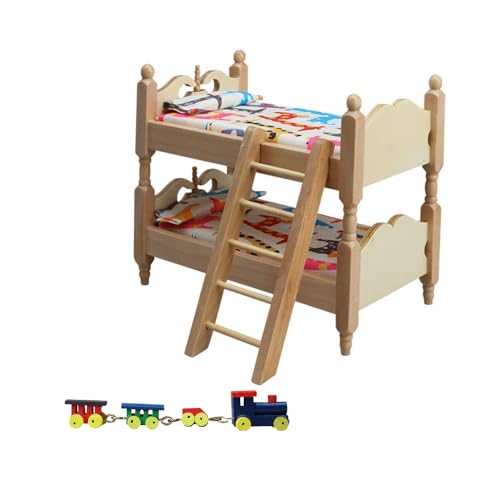
1/12 DOLLHOUSE FURNITURE: each package includes a mini bunk bed with ladder and a set of wooden train,these mini dollhouse accessories are so charming and interesting,it is suitable for dollhouse decoration
Anchor the Bunk Bed to the Wall and Final Safety Check
Now that your ladder’s secure, let’s make sure the whole bed won’t wobble or tip.
First, you’ll locate two or more wall studs and mark bracket alignment points on the bed’s top one-third. For brick, use painter’s tape for drift prevention. Attach L-brackets to the bed frame here, pre-drilling hardwood to prevent splitting. Stabilizing furniture is a simple and critical safety measure for any homeowner.
Now, anchor them to the wall. Drill pilot holes into your stud marks and drive in 3-4 inch lag screws. On concrete, use a hammer drill and sleeve anchors. Check that everything’s tight without warping.
Finally, verify all connections. Your bunk should feel rock-solid. Consider anti-tip straps if wall anchoring isn’t an option, or consult a pro if you’re unsure.