How to Fold Bed Sheets Into a Pillowcase for Easy Storage
Folding sheets into a pillowcase is the ultimate closet organizer, but getting that neat bundle can be tricky. You’ll master it easily. Start by perfectly folding your fitted and flat sheets into matching rectangles. Stack them, then use a pillowcase as a wrapper: slide your stack in and fold the top over to seal the tidy package. This simple method keeps full sets together and saves tremendous space. Perfecting a few key folds makes all the difference.
Master the Foundation: How to Fold a Fitted Sheet Flat
Let’s demystify folding a fitted sheet flat.
You’ll start on a large surface. Lay your sheet inside out, elastic up. You can see all four corners now. Shorter edges go left and right. This basic rectangle setup is key for your first step: corner alignment.
Here’s the pocket technique. Insert your hands into two corners on one long side. Perform a pocket inversion; flip one corner over your opposite hand. You’ve made your first pocket. Repeat this with the other two corners. Nest all four into one consolidated pocket. Hold them and give a gentle shake to straighten the edges. For elevated bunk beds, achieving a taut fit is easier if you first master the hospital‑corner technique on the mattress. Finally, fold into thirds twice for compact storage. This method is particularly effective for sheets with corner elasticities often found on bunk beds.
Your takeaway: mastering this inversion creates a manageable flat layer, the essential foundation for everything that follows. For Murphy beds, storing these folded sheets in under‑bed compartments keeps them accessible and out of sight.
Create a Neat Rectangle: Folding Your Flat Sheet
Your goal is a compact, even bundle. That neat rectangle is perfectly prepped for its final step: becoming a space-saving package. The technique is a great storage way to keep pajama sets together. When maximizing vertical space in a room, considering built-in bunk beds can similarly optimize a small layout. This method highlights the benefits of a DIY approach for its cost‑effectiveness and easy storage, a principle also valued when selecting furniture with multi‑functional pieces.
Fold Your Pillowcase as the Perfect Wrapper
Fold Your Pillowcase as the Perfect Wrapper
Now, that neat rectangle you’ve folded needs a tidy wrapper. Lay your extra pillowcase flat. Fold it in half lengthwise. Here’s the key: verify your fabric orientation places the open end toward you. That’s your insertion point. Smooth it flat. Next, slide your sheet stack inside, bottom first. Align it so there’s space on all four sides. This seam alignment matters—keep the pillowcase’s seams oriented away from your stack. Now fold the top, empty half down over the bundle. Tuck it over completely. If there’s an inner flap, fold that outward first for a tight seal. Then fold the entire flap back over the bundle’s end. You’ve created the perfect wrapper. Just as with clever bed gap solutions, a little attention to detail maximizes both function and form. Ensuring your bed frame itself is secure with simple DIY fixes makes all your bedroom organization more effective. To ensure your linens stay fresh, store your final bundle in a cool, dry environment to prevent mold and damage.
Stack and Fold Your Sheets for a Compact Bundle
Here’s your order. Place the flat sheet down first. Layer the folded fitted sheet squarely on top. Now, add one folded pillowcase. You’ve created a stable, aligned stack. Smooth each layer as you go. This prevents bulk and wrinkles.
Your Organization Techniques hinge on this compact pile. Keep your second pillowcase open nearby. You’ll need it for the final step. Your bundle should now be tidy and manageable. Getting this right means everything stores neatly without shifting, much like space-saving wall beds optimize a room’s layout. Perfect stacking is your key to a space-saving set, akin to the room flexibility achieved by a wall bed. For a similar efficiency in freeing up floor space, consider how a Murphy bed transforms vertical and horizontal dimensions.

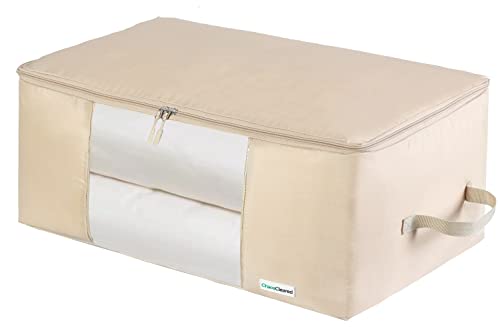
4 PACK SHEET ORGANIZERS - Make your linen closet organized and beautiful with this foldable bed sheet fabric organizer; Each Storage Organizer SIZE: 5"W x 15"D x 12.8"H

Reinforced Handles: The reinforced handles are sewn with 3 layers of fabric to ensure easier carrying. You can lift the storage box without worrying about it breaking when filled with heavy clothes

Bed Sheet Organizer: Each bed sheet Organizer is measured as 4.95"W x 15"D x 12.8"H. Ideal for 1 bed sheet set or for a duvet cover set to keep linens and other items organized with easy access. Our bedsheet organizers are the perfect solution to organize your home, saving time and energy
The Final Fold: Tucking Your Sheets Into the Pillowcase
Insert your compact bundle with measured, deliberate movements. Smooth the layers as you go. Now, you’ll create the Secure Envelope Closure. Fold the pillowcase’s open edges inward over the bundle’s top. This seals everything inside like an envelope, much like the self-contained convenience of a quality folding bed. For frequent use in small spaces, look for furniture that prioritizes both ease of transformation and durability, and consider models with a low storage footprint for easier long-term storage.
Press down firmly to lock the sheets in place. This prevents the bundle from slipping or bulging. Your goal is a clean, rectangular package.
You’ve just mastered the final fold. Your complete set is now a single, organized unit ready for the shelf.
✅EASY COMFORTER STORAGE - Simply fold and fill your items in our mold, dust, and insect proof bags; Our breathable oxford fabric is also machine washable; Compare with "non-woven fabric" (cheaper material that isn't washable and won't last long)

✔️ EASY COMFORTER STORAGE - Simply fold and fill your items in our mold, dust, and insect proof bags; Our breathable oxford fabric is also machine washable; Compare with "non-woven fabric" (cheaper material that isn't washable and won't last long)

[3-Layer Compression Bags] Our ultra space-saving self-compression organizer features a unique 3-layer compression system, offering not only more storage capacity than standard 2-layer designs but also greater flexibility. It’s perfect for blanket storage, comforter storage, pillow storage and bulky items, allowing you to optimize every inch of space in your closets or underbed storage containers.
5 Tricks to Eliminate Wrinkles and Perfect Your Bundle
You’ve got a neatly folded bundle, but those stubborn wrinkles can still make it look less than perfect. Let’s fix that.
Do you need a machine or just your hands?
First, try the shake-and-stretch method. Spread the sheet on your bed, grab the top corners, and pull outward slowly. This resets the fabric’s shape. Choosing the right bedding accessories, like those used for a Murphy bed setup, often requires prioritizing space‑saving and easy handling.
What if the creases are already set?
The heat trick works wonders. Toss the sheet in the dryer for a few minutes with a damp cloth; the steam releases wrinkles. Selecting a durable fabric for your sheets can also help them resist wrinkling and hold their shape better after folding. For an effective and safe clean on other bedding, a mattress cleaning solution can be made with simple ingredients like hydrogen peroxide, dish soap, and baking soda. When dealing with difficult infestations, a professional heat treatment can penetrate materials to eliminate pests.
For no heat, use the rolling method. Roll the sheet tightly and slide it under your mattress for a few hours. The pressure smooths it out beautifully.
Now your bundle is truly pristine and ready for the pillowcase.
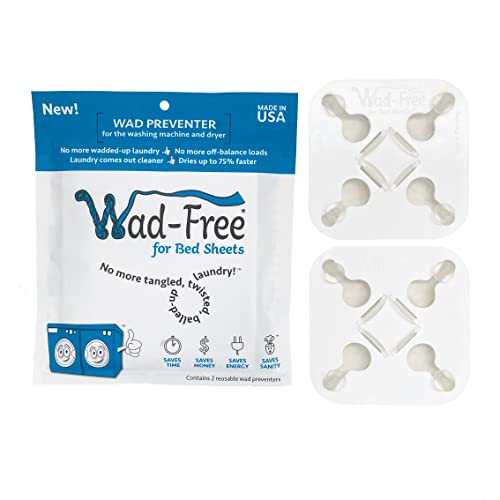
Wad-Free for Bed Sheets reduces the tangling, twisting, and balling-up of bed sheets in both the washing machine and the dryer. Drastically reduces wet items getting trapped in the sheets. Loads come out cleaner, helps the washer drum stay balanced, sheets dry faster with fewer wrinkles. Saves time and energy on laundry day.

🌐WASHABLE POLYESTER 210GSM FABRIC:100% polyester fabric, thick,durable, soft,tear resistant and anti-shrink,ensures it can last longer and withstands repeated use. The heavy duty fabric's own drape will make the table cloth wrinkle-free,more flattering and upscale looking. Super easy to clean with a damp rag too.

100% Wrinkle Free Material - The 100 inch projector screen used soft touch and stretchy thick polyester fiber material to ensure maximum wrinkle free, providing clearer images, brighter colors and no color cast. Please be assured that all of our movie screen will undergo rigorous quality inspection process before sending out, so there will be no any spots on the screen to affect the viewing experience. NOTE: Please note the SIZE before you purchase!
How to Bundle King Sheets, Twin Sheets, and Everything Else
Now that your sheets are wrinkle-free, let’s get them bundled for storage. You’re handling different sizes and fabric types, right? Here’s the universal method.
For a king set, tuck the fitted sheet’s elastic corners inside each other. Fold it into a compact rectangle on your bed. Fold fitted sheet in half hamburger style with the design facing down to begin a tidy fold. Fold the flat sheet to match. A twin set follows the same principle but folds down smaller. Obviously, you’ll color coordinate sets.
Always stack your folded flat sheet atop the fitted one. Use one pillowcase as a storage pouch. Slide your neat stack inside and tuck the flap over. This creates a flat, stackable bundle for any size, similar to the way a loft bed with integrated storage utilizes vertical space efficiently. Your linen closet just got organized. Incorporating flexible lighting into your bedroom can make this organizing task easier. Ready to see how two pillowcases can improve this?

♩Baby Tooth Container: The size of tooth fairy box is 2 x 1.4 inches, be used to store the extracted teeth and be placed under the pillow.As a children's product,each tooth box is carefully manufactured, inspected and packaged.

【Vintage Elegance】Showcasing a classic checkered pattern, this cosmetic bag adds a touch of retro sophistication to your daily essentials.

Bundle a Set With Two Pillowcases
You’ll use one pillowcase as part of your folded stack. Fold your fitted and flat sheets neatly, then stack them with that first pillowcase. Fold this stack to fit inside your second, empty pillowcase.
Slide your bundle into the lower half. Now fold the top over, creating a tight, unified package. It’s a single, clean unit for your linen closet or suitcase. You’ve just transformed a loose set into one manageable bundle. This simple step is a game-changer for keeping everything together.
Fix Common Folding and Bundling Mistakes
Even if you’ve mastered folding sheets into a pillowcase, a few common snags can still leave you with a tangled, wrinkled mess.
Start with dryer maintenance. Toss in dryer balls and always wash sets separately for better sheet separation. Shake them out before drying and remove immediately. This prevents pretzel-like tangles. Remember to flip the fitted sheet inside out first to make matching the corners easier, as inside-out facing is a key trick of the trade.
Now, for folding. Turn the fitted sheet inside out first. Match corners precisely, holding them together. Smooth everything on a flat surface to avoid misalignment.
Let sheets cool before folding to dodge stubborn wrinkles. Stack your folded fitted sheet, flat sheet, and one pillowcase neatly. Slide this compact bundle into the second pillowcase. If it bulges, refold into thirds. You’ll get a tight, storeable bundle every time.

HYPOALLERGENIC: Bounce dryer sheets are hypoallergenic, free of any dyes or perfume, making them a perfect choice for those with sensitive skin

Dryer sheets fight static in the dryer while adding the amazing GAIN scent

FIGHTS STATIC CLING: Bounce Dryer Sheets keep you virtually static-free