How to Draw a Loft Bed: Step‑by‑Step Guide
You’re wondering where to even begin drawing a loft bed—that initial 3D sketch is the key most guides gloss over. Start on graph paper, using a ruler to block its full volume: a 93″ long by 72″ tall frame. Lightly sketch the 2×6 lumber frame and 4×4 corner posts first, ensuring your perspective lines are accurate so it doesn’t look flat. Get this structural skeleton right, and the rest—like adding the ladder and shading for depth—builds naturally from a solid foundation.
Start With the 3D Frame and Basic Structure
You’re probably wondering how to even begin building something this big and sturdy. You’ll start by drawing the 3D frame. Focus on the frame proportions first: 93 inches long, 61 inches deep, and 72 inches tall. Getting those right in your sketch is everything. Perspective accuracy makes it look real, not flat. Think of a box tilted slightly so you can see the front and side. That’s your basic volume. Now, lightly sketch the main horizontal frame using 2×6 lumber, forming an L-shape against the walls. Mark where your vertical 2×4 legs will connect. This wireframe establishes all your anchor points. Your takeaway? Nail the proportion box in perspective, and you’ve built a believable skeleton. The real bed frame will be constructed using both an inner 2×3 frame and this outer 2×6 structure. Next, you’ll define how those supports connect. Remember to design your final sketch to include essential safety railings to prevent falls. Consider using basic shape construction to map out the mattresses and ladder before adding finer details. Always consult a detailed step-by-step guide for precise measurements and assembly instructions.

🥇🥇【Heavy Duty Loft Bed Twin Size: Modern】Made of heavy-duty steel, this twin size loft bed features a black finish that adds an industrial touch to your bedroom and complements any room style. 51 inch under-bed clearance that you can turn the space into a reading nook or a craft area.

【SOLID & STURDY BED FRAME】Constructed by 100% solid pine wood with white paint finish, this kids loft bed features 1 center beams, full-length guardrail and wood slat support, all these enhance this full loft bed load capacity to 264.55 LBS

Easy to assemble metal twin size bed frame, include hardware, tool and clear instructions.
Add the Stairs, Ladder, and Safety Railings
Now, with your frame mapped out, the question becomes how to actually get into the bed and stay safe up there.
Ladder or Stairs?
You’ve got two main choices. A straight ladder is simple, but give its rungs grooves for ladder traction. An angled one needs a sturdy handrail. For a more integrated look, draw a staircase alongside the frame. You can even add staircase drawers into each step for storage. Consider drawing an L‑shaped stair design if your room layout requires a more compact footprint. Always confirm your design has adequate headroom clearance by measuring from the tread to the ceiling. When drawing the ladder or stairs, carefully consider their weight capacity to ensure safety and durability.
Don’t Skip the Railings
Obviously, you’ll need a safety railing on the elevated bed. Draw it running along the open sides. Use sturdy posts and a top rail that’s secure. This isn’t just for style; it’s for safety. Your drawing now shows a complete, functional loft structure.
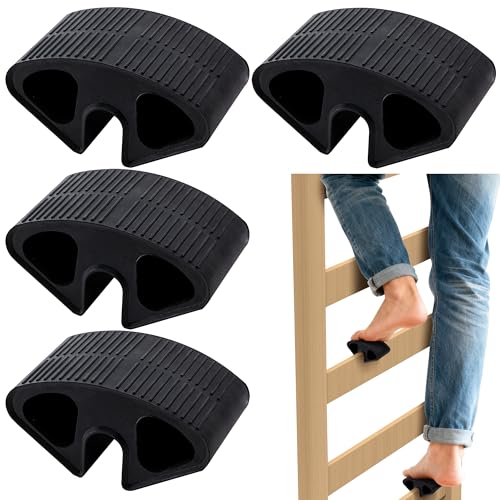
Outstanding Performance:Dorm bed step protector features an anti-slip surface design, with a 2.4-inch-wide tread providing stable support. It effectively prevents slipping even when wearing socks or with wet feet, enhancing safety and comfort when getting in and out of bed.

【SIZE】2.75 x 1.3 x 0.78. Inside Width: 2.5cm/1inch. Package: 4pcs bunk bed hook and equipped with M3.5*14mm and M4*16mm two sets of screws(total 24pcs screws). There is no expansion screw set, and the buyer needs to buy it himself. Please check the dimensions before buying.

【Loft Beds】This Twin size loft bed features curved metal tubing on both the headboard and footboard, available in classic black and modern white,an ideal choice for your prince or princess's bedroom.
Sketch in Mattresses, Pillows, and Bedding Details
All right, so you’ve got your sturdy frame up, but how do you actually show someone sleeping up there? You’ll sketch the mattress first, a ten-inch-thick rectangle on its plywood base, ensuring its depicted thickness aligns with common standard loft bed heights. When illustrating this, consider the 5 to 6-foot clearance beneath the bed to accurately represent the space for a desk or seating area below. Remember, for a person of average height to sit comfortably underneath, you’ll want to include a desk and chair to demonstrate the adequate headroom.
Now, place pillows against the headboard. Draw them with overlapping curved lines for soft, stacked depth.
Next, define the bedding. Illustrate sheet folding with angled lines to show fabric draping over the mattress edge. Add blanket layers with parallel curves to suggest thickness. Your texture rendering comes from subtle line variation, making fabrics feel real.
Finally, use software tools like SketchUp’s Artisan to smooth edges and apply materials, enhancing realism. You can also simulate soft furnishings like blankets and pillows with ClothWorks plugins to achieve realistic draped forms. You’ve now created a comfortable, detailed sleeping area. Ready to guarantee it’s securely attached?

KING PILLOWS SET OF 2, 100% COTTON COVER: 250 thread count cotton cover filled with 1,420g of hollow fiber down alternative fill. The result? A plush 8” loft, with more fill than most competitors, inside a naturally breathable shell that’s gentle on skin.

QUEEN PILLOWS SET OF 2, 100% COTTON COVER: 250 thread count cotton cover filled with 1,050g of hollow fiber down alternative fill. The result? A plush 8” loft, with more fill than most competitors, inside a naturally breathable shell that’s gentle on skin.

PREMIUM PLUSH COMFORT — Crafted from 100% micro fleece at 190 GSM, these velvet-soft sheets feel like cozy blanket-soft luxury for cold winter nights, or even everyday use
Incorporate Supports, Posts, and Platform Slats
Alright, you’ve sketched a cozy sleeping area, but how does it actually stay up? Your drawing needs a strong skeleton. Start with five stout 4×4 vertical posts at the corners and one for the ladder. These are the primary pillars. Now, draw the platform frame they hold up using 2×6 and 2×4 lumber.
For the sleeping surface, you add platform reinforcement. Lay 2×4 slats across the frame, evenly spaced, and top them with a solid sheet of plywood. Or, for a more breathable base, draw in individual wooden slats. The precise slat spacing is key; maintain a standard 3-inch gap between each. This prevents mattress sagging and ensures proper weight distribution for safety. Your structure now has credible, weight-bearing logic. Remember to incorporate sturdy support brackets into your drawing where the horizontal frame members meet the vertical posts. When designing the guardrails, always refer to local building codes for the required minimum height to ensure safety compliance. Next, you’ll make this framework look solid and real.
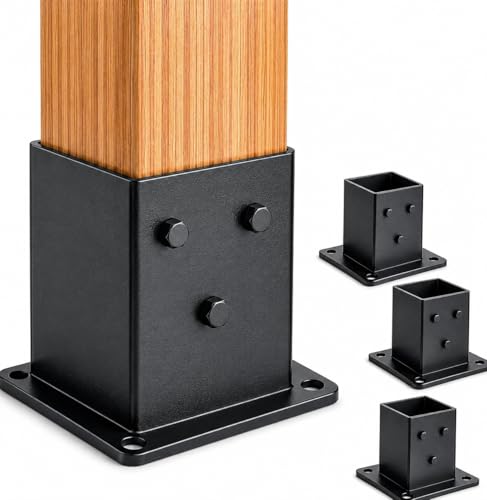
HEAVY DUTY 4x4 POST SUPPORT - ORIGLE post base brackets are made from thick steel with a black powder-coated finish for outdoor use. Each bracket helps secure 4x4 wood posts for decks, pergolas, railings, pavilions and similar structures.

Save Time & Effort: Pre-drilled holes and elongated slots make installs quick and frustration-free. Even DIY beginners can bolt down posts with confidence and adjust for perfect alignment

【Sturdy Post Base】The post base adopts the 2mm thick steel plate powder coating process, which can keep the post from corrosion. The solid steel material provides strong support for the post anchor and can effectively improve the service life of the post anchor. This deck post base has a bright black appearance and more texture than others. The curved appearance is more decorative than the ordinary upright wooden post base
Apply Shading and Textures for Depth and Realism
Where exactly should the shadows go?
Pick a single light source, like a window on the right. Now shade the left side of every post and the platform’s underside. Deepen these shadows near the bed frame to show thickness. Don’t forget cast shadows underneath the platform; they stop your bed from looking like it’s floating. Use value changes to create depth and three-dimensional forms. Accurate shading can also imply the strength and stability of the heavy-duty support beams. For a structurally sound drawing, ensure your shading aligns with the bed’s real-world support brackets and frame.
How do you add convincing texture?
Layer stippling or directional lines to suggest wood grain, but mainly on lit surfaces like the top platform. Reduce texture in shadowy areas. This contrast creates immense depth. You’re building a tactile illusion, blending smooth gradients with detailed marks for a finished, three-dimensional form. Your drawing should also reflect secure construction, such as depicting proper guardrail height for safety.
Gather Your Drawing Tools and Materials
How do you keep all these supplies from becoming a mess? Group them by function: measuring tools together, pencils and erasers in another spot. This simple system lets you focus on drawing, not searching. When sketching the design, it’s critical to consider the proper clearance for the structure in the actual room, which is directly influenced by the adequate ceiling height. As you plan, incorporating features like integrated stairs can enhance both the design’s functionality and its safety profile. With your tools sorted, you’re ready to block in that first confident line.

【Enhanced Safety for Kids】This low loft bed features a 13.8" extended guardrail, a heavy-duty metal frame up to 400 lbs, rounded corners, anti-toppling device, and a wide ladder with soft foam padding makes climbing safer for little feet. Fits 4–6" mattresses to keep children securely in place through the night.

【Enhanced Safety for Kids】This low loft bed features a 13.8" extended guardrail, a heavy-duty metal frame up to 400 lbs, rounded corners, anti-toppling device, and a wide ladder with soft foam padding makes climbing safer for little feet. Fits 4–6" mattresses to keep children securely in place through the night.

【Enhanced Safety for Kids】This low loft bed features a 13.8" extended guardrail, a heavy-duty metal frame up to 400 lbs, rounded corners, anti-toppling device, and a wide ladder with soft foam padding makes climbing safer for little feet. Fits 4–6" mattresses to keep children securely in place through the night.
Troubleshoot Common Drawing Challenges and Finalize Your Sketch
Perfecting a loft bed sketch means conquering common pitfalls that blur your vision. You’ll get tangled if your guide curves intersect profiles or are misaligned. Focus on Parallel Line Consistency first. Sketch all verticals truly vertical and horizontals perpendicular. Use a ruler for scale, say 1 inch equals 1 foot. Your Angle Line Accuracy matters too. Draw all angled lines, like those ‘coming out of the page’, with identical slopes. This prevents a distorted, wobbly look. Remember to incorporate integrated storage and desks if your design aims to maximize the functionality of the space below. When adding these features, consider their impact on the weight limit of your structure to ensure safety and stability. Ink your final top lines with a pen over your light pencil sketch. Erase any stray marks. Validate your proportions by checking zones in your layout, as zone tools can help visualize what areas are oversized or tight. Your final step? Double-check all your board lengths and mattress dimensions before you consider this sketch finalized. Now you can build from a clear plan.