How to Build a Wall Bed: Step‑by‑Step Guide
Looking to build a wall bed and wondering how to tackle it safely? First, you’ll plan your layout, ensuring your ceiling height accommodates a vertical or horizontal bed and verifying a solid 7.5-foot floor clearance. Then, you’ll construct a sturdy cabinet box from plywood, assemble the folding frame, and install heavy-duty hinges and pistons. Finally, you’ll anchor it securely to your wall studs. Obviously, precise mounting is your top safety priority. A well-built wall bed is the ultimate space-saving solution, and there’s more to ponder about each step.
Plan Your Wall Bed Layout and Measurements
You’ve probably got a room that feels more like a puzzle than a living space, and you’re wondering how a bed can possibly fit. Here’s your starting point: choose between vertical and horizontal layouts. This decision drives everything. Vertical beds, like a queen at 87-90″ tall, need at least 8.5-foot ceilings. Horizontal beds, averaging 70″ high for a queen, are better for low ceilings.
Now, meticulous space planning is critical. You’ll verify all dimensions—closed cabinet depth (often 16-24″), open projection (up to 87″), and needed floor clearance. Don’t just measure the wall. Your clearance verification must account for doors, vents, and a full 7.5 feet opposite the wall for walking space. Always add inches for moldings and anchoring. This is also the time to identify any required wall reinforcement if your wall studs are not ideally placed. Get this foundation right, and the rest becomes straightforward. Before finalizing, ensure your standard mattress sizes, such as a queen (60” x 80”), align with the mechanism’s specifications and your space constraints. A successful custom build requires precise cutting the frame components to achieve a perfect fit. Next, you’ll confirm your mattress is compatible.

𝐂𝐎𝐌𝐏𝐋𝐄𝐓𝐄 𝐌𝐔𝐑𝐏𝐇𝐘 𝐁𝐄𝐃 𝐇𝐀𝐑𝐃𝐖𝐀𝐑𝐄 𝐒𝐘𝐒𝐓𝐄𝐌 — WHAT’S IN THE KIT — Includes gas piston lift system (smooth open/close rated for daily use), patented 2-in-1 auto-locking stainless steel pivot plates, heavy-duty square tube folding legs, quick-release mattress retention strap, all mounting hardware and fasteners, plus 3 fully illustrated guidebooks (Cut List Guide, Construction Guide, Assembly Handbook). No separate hardware store runs needed for the mechanical components.

Smart Space-Saving Wall Bed: Transform any room instantly with this innovative queen-size Murphy bed that effortlessly converts from a sleek cabinet into a comfortable sleeping space. Perfect for small apartments, home offices, or guest rooms, this versatile furniture piece creates a flexible living area without compromising style. The smooth transition mechanism and space-efficient design maximize your floor space while maintaining full bedroom functionality whenever needed.
Select Materials and Make Precision Cuts
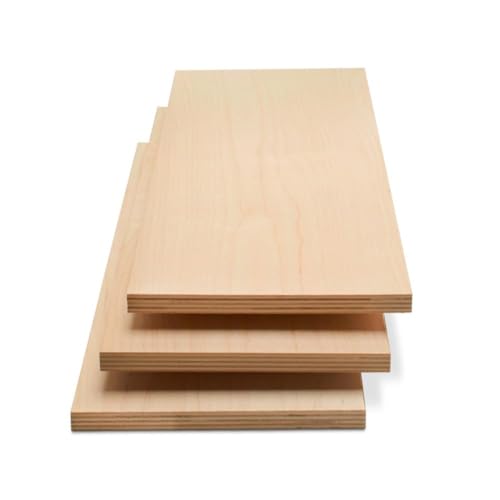
Now, with your layout confirmed, it’s time to pick the right stuff and measure it all carefully. Your plywood selection is critical; you’ll primarily use sturdy ¾” birch for the main structure and ¼” sheets to close up panels. Mix in some solid pine for frame pieces. For fastener types, you’ll rely on 1¼” and 1½” wood screws for general assembly, 3” lag screws for heavy points, and wood glue for a firm bond. Using a full cut list and step-by-step instructions included with your kit greatly simplifies this preparation process. Precision cuts are non-negotiable—use a track saw or circular saw with a guide for your plywood. A mistake here means the hardware won’t operate smoothly, so consult the guide for ensuring smooth operation for critical tips. It’s also wise to review all safety precautions before proceeding with any cutting or assembly. For the pivot mechanism, you’ll need to source heavy-duty hinges and pistons to safely manage the bed’s weight. Your takeaway: measure twice, cut once with the right materials. Next, you’ll assemble these precise components into the cabinet box.
STRONG, DURABLE, HEAVY-DUTY - These craft wood pieces of multi-coated Baltic Birch plywood offer exceptional durability, rigidity, and stability for all your woodworking needs. The surfaces provide excellent holding power for glue and screws and the birch edges create cleaner joinery.

STRONG, DURABLE, HEAVY-DUTY - These craft wood pieces of multi-coated Baltic Birch plywood offer exceptional durability, rigidity, and stability for all your woodworking needs. The surfaces provide excellent holding power for glue and screws and the birch edges create cleaner joinery.

Premium Quality Baltic Birch Plywood: Made from high-quality B/BB grade Baltic Birch, offering superior strength, durability, and a smooth surface for all your crafting needs.
Construct the Wall-Anchored Cabinet Box
Let’s tackle your cabinet sides first, because that’s the backbone of the whole box. Cut them from 3/4″ plywood to your height and depth. Predrill and countersink your screw holes, then secure each side to a 2×4 base with glue and multiple screws. This foundation is essential for Cabinet Stability.
Now, assemble your top from 3/4″ pine, joining boards with pocket screws. Attach this top and your base to the assembled sides with glue and screws. Add an interior shelf for rigidity. That solid box is your prerequisite for safe Wall Mounting later. A smooth, professional finish can be achieved with sandpaper and a coat of paint or varnish as detailed in the DIY guide. Be sure to use proper anchoring for maximum security against tipping.
Pre-drilling prevents pine splitting during assembly.
Next, you’ll build the shelving that fits above the bed space, creating that built-in look and adding more structural support to the frame. Always perform a final safety inspection to ensure all connections are secure before regular use.

3/4" / 18mm Black Phenolic Baltic Birch Plywood - Enjoy the stacked ply look of Baltic Birch with the added benefit of the phenolic overlay.
3/4" / 18mm Black Phenolic Baltic Birch Plywood - Enjoy the stacked ply look of Baltic Birch with the added benefit of the phenolic overlay.

STRONG, DURABLE, HEAVY-DUTY – These craft wood pieces of multi-coated Baltic Birch plywood offer exceptional durability, rigidity, and stability for all your woodworking needs. The surfaces provide excellent holding power for glue and screws and the birch edges create cleaner joinery.
Assemble the Wall Bed’s Folding Platform
You might be wondering how the actual bed platform gets built once the cabinet box is anchored. Start by constructing the inner bed frame from those 1×2 wood struts. Glue and pin them together into an L-shaped configuration, then drill pilot holes through each leg. You’ll fasten the assembly with 2-inch wood screws. Now, round over the side rails using the provided template to prevent injury. Always wear safety glasses during this process to protect against flying wood debris. Sandwich the head rail and foot rail between these side rails during mounting, securing them with 1-inch drilling depth and number 10 wood screws. This sturdy platform distributes weight evenly and prevents mattress shifting. After integrating the support system, you’ll complete the final connections and verify all mechanism torquing meets specifications before operational testing. For a safe installation, always verify the system’s load capacity aligns with your mattress and user weight. To ensure a smooth and quiet operation, remember to lubricate the mechanism bearings if any squeaking occurs after assembly. If you ever need to remove the unit, you must first detach the mattress and safely lower the folding mechanism. This creates the foundation that folds.

【Space-Saving Multifunctional Murphy Bed】This murphy bed seamlessly converts between a wall cabinet and a queen-size platform bed. The bed frame can be fully folded into the cabinet together with the mattress (not included), effectively freeing up floor space and keeping your room tidy. Its versatile design serves as both a cozy bed and an elegant desktop, dresser or cabinet, blending perfectly into guest rooms, home offices, studios and other compact spaces.

Space-saving Design -- When you wake up, you can easily fold the Murphy bed frame into a cabinet to provide plenty of space for your indoor activities during the day.

[Safe and Durable Construction] - Crafted from premium pine wood and composite woods, this Murphy bed boasts enhanced bed platform and reinforced framing structure, allowing for comfortable lounging, movie nights, or gaming marathons.Simply pull out the bed framing with the attached handles, secure the legs for a long-lasting support to your mattress(Not included).
Install Hinges and Hardware for Smooth Operation
You’ve probably seen hinges and hardware kits and wondered if they’re just generic parts or if specific choices truly matter for safety and smooth operation. Obviously, they do. Your lift technique depends on quality components like spring mechanisms that let you fold the bed with as little as 5 lbs of force. These concealed hinges and counterbalance systems are core to the fold-down design. Proper hardware maintenance starts with installing Vevor hinges or similar quality ones to prevent misalignment and jamming. Kits include pistons, plates, and notched stiffeners for a secure frame. Follow instructions to attach everything precisely, ensuring mechanisms bear weight without bending, which is critical to supporting the bed’s safe weight capacity. This guarantees smooth, safe operation for years. A correct installation also addresses the need for professional installation highlighted in considerations of Murphy bed trade-offs. Your next focus? Securely anchoring this now-functioning unit to your wall.

1. Universal Compatibility and Perfect Fit:No more worrying about brand limitations. Our hinge mounting clamps feature a universal design that fits a wide range of common concealed hinges, from 5.3 to 7.8 inches in length and 1.1 inches in width, including brands like Zeyuansen. This versatility ensures a perfect, seamless installation on your wooden doors, cabinet doors, or Murphy doors, making it the single template needed for most concealed hinge projects, eliminating the need to purchase multiple brand-specific clamps.

PERFECT FIT FOR TamBee HIDDEN HINGE - Specifically designed to work seamlessly with TamBee 6inch Hidden Hinge. It is not compatible with hinges from other brands

1. Universal Compatibility and Perfect Fit:No more worrying about brand limitations. Our hinge mounting clamps feature a universal design that fits a wide range of common concealed hinges, from 5.3 to 7.8 inches in length and 1.18 inches in width, including brands like Zeyuansen. This versatility ensures a perfect, seamless installation on your wooden doors, cabinet doors, or Murphy doors, making it the single template needed for most concealed hinge projects, eliminating the need to purchase multiple brand-specific clamps.
Securely Anchor the Unit to Your Wall
Now, perform a quick foundation load assessment. Align at least three lag screw points with the top third of the frame. This prevents tipping. Drill your pilot holes at the stud centers.
Here’s the thing: you’ll drive 3-inch lag screws using a ratchet. Tighten them firmly into the studs, but don’t overtighten and crack the drywall. Verify everything is level and rock-solid before you test the bed’s motion. This step is non-negotiable for safety. You should also use a stud finder to ensure your pilot holes are drilled into solid structural members and avoid hidden electrical or plumbing lines. Many quality beds like the Bestar queen wall bed specify the need for precise wall mounting to ensure long-term stability and safety. A properly installed foldaway bed is a hallmark of excellent space‑saving design. Periodically inspect the anchors to ensure the bed remains stable over time. Next, you’ll move on to the finishing details.
Apply the Final Trim and Paint
All right, you’ve anchored your wall bed securely and you’re staring at its bare bones, wondering how to make it look like it belongs in your room. The secret is surface preparation. Remove hardware, then sand all areas, especially seams. Fill imperfections with wood putty. For proper primer adhesion, use a product like Bullseye 123. Apply multiple coats on rough spots.
How do you make it all feel cohesive?
You handle color coordination. Choose a scheme. You might pick a dark paint for the bed against light walls. Use a durable paint, like Valspar’s cabinet formula. Now install 1×6 trim with mitered corners. Nail it only to the vertical boards, not the face. When adding edge molding, remember that its weight reduces the maximum recommended mattress weight to ensure the gas pistons can function properly. This is a critical safety precaution when customizing any fold-down bed system. Before final assembly, verify the wall structure can handle the additional load of trim, paint, and mattress. Your final step is reinstalling hardware after everything dries. Your built-in is complete.