
What to Put Between a Bed and a Wall?
You’ve found the right place — that gap’s a nuisance for losing pillows and trapping dust. You can wedge in a specialized foam pillow for gaps up to 5.5 inches or cut a durable silicone strip for a wipeable seal. For a custom DIY fix, tightly wrapped fabric over folded cardboard creates a cushioned barrier. Ultimately, your choice depends on whether you want a soft look or a simple, cleanable solution.
Why Gaps Between Beds and Walls Are a Problem
It’s a common annoyance: you’ve got that frustrating gap between your bed and the wall. It’s not just ugly; it’s a real hassle.
Your pillows constantly slip down into the void. Small items like your phone or TV remote vanish. You’re constantly fishing things out. Cleaning is nearly impossible, letting dust and allergens accumulate in that dark crevice. Obviously, it ruins your room’s tidy look.
Here’s the thing: the problem can get worse. In older homes, settling foundations or a lack of proper wall reinforcement can lead to gap widening over time. This isn’t just irritating—for parents, it’s a safety risk where a child could roll into the space. For bunk beds in particular, this risk makes securing the bed frame to a wall stud even more critical. A primary cause is often the floor itself, such as when you have uneven flooring or a slick surface like hardwood. So, you’re right to want a solution. This is similar to the precision needed when making final adjustments and safety checks for other furniture installations. Let’s figure out what actually works.
How to Choose the Right Bed Gap Solution
Now, you’ve seen why the gap is a nuisance, but you’re probably wondering how to pick a fix that actually lasts.
First, identify the root cause. Is it two separate mattresses drifting apart? If so, mattress connectors are your permanent fix. They physically join the mattresses to prevent movement. For a versatile and ready-to-use option, consider a V-shaped foam filler specifically designed to fill the gap between separate mattresses in a split king configuration.
Is the gap from a low mattress sinking below the headboard? Here, foundation adjustments work. You raise the entire mattress height with a taller foundation. Since bed bugs can use their tiny claws and adhesive pads to climb walls, a tight seal also helps prevent bed bug harborage sites in wall voids near the bed, and it is wise to regularly monitor with interceptor traps to detect any early signs of pests.
Temporary fillers just treat the symptom. They’re fine for quick comfort, but gaps will return.
Your lasting choice depends on the source. Fix the movement or adjust the height.

Multi-purpose gap filler design: The pillow not only bridges the gap between the headboard and mattress, preventing items and pillows from falling off the bed effectively. It's tailored for gaps of 2-2.8" inches, ensuring a secure solution and eliminating worries about lost items.

Extra-Wide Coverage: 12-inch width mattress gap filler eliminates the hump; creates a smooth surface so you can lay flat
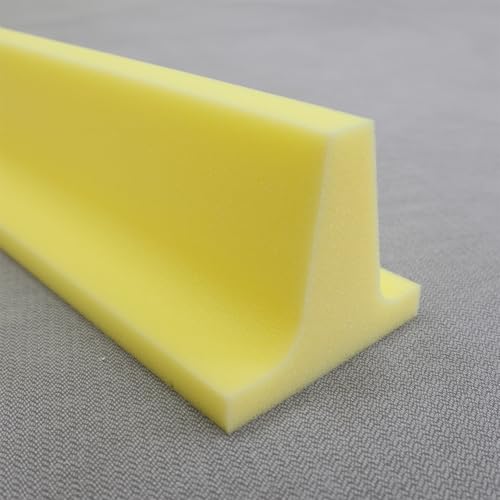
Multi-purpose gap filler design: The pillow not only bridges the gap between the headboard and mattress, preventing items and pillows from falling off the bed effectively. It's tailored for gaps of 1-2", ensuring a secure solution and eliminating worries about lost items.
Store-Bought Gap Fillers: Pillows and Silicone Covers
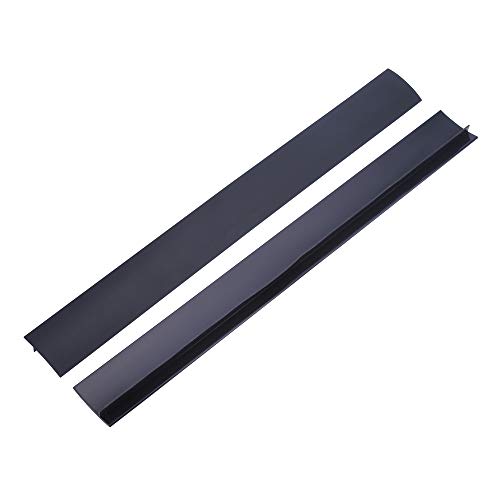
Now, silicone strip covers are an adapted option. You can cut these flexible, kitchen-grade strips to length. They create a smooth seal against irregular walls. Honestly, their durability is excellent, but they lack the soft finish of a fabric pillow. Your choice hinges on whether you prioritize a cushioned look or a simple, wipeable barrier, which is a common consideration when selecting space-saving furniture for tight bedroom layouts, such as a full-over-full bunk bed. This is especially important for high‑rise loft beds where maximizing every inch of floor space is key. The material is heat resistant up to 460°F and can be cleaned with just a damp cloth.
COVER GAPS: This bestselling stove gap covers is very easy to clean which keep the crumby cruddy grossness out of the gap between your stove and countertop, or any other appliances in your household.

White Color 118 Inch Peel And Stick Wall Molding Trim
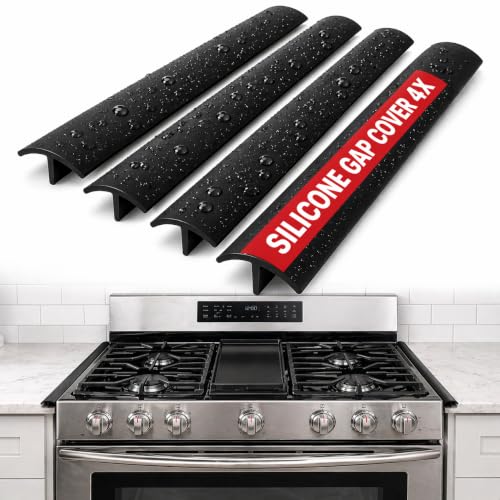
𝐔𝐍𝐈𝐕𝐄𝐑𝐒𝐀𝐋 21” 𝐒𝐓𝐎𝐕𝐄 𝐆𝐀𝐏 𝐂𝐎𝐕𝐄𝐑 – 𝐍𝐎 𝐂𝐔𝐓𝐓𝐈𝐍𝐆 𝐑𝐄𝐐𝐔𝐈𝐑𝐄𝐃 𝐅𝐎𝐑 𝐌𝐎𝐒𝐓 𝐊𝐈𝐓𝐂𝐇𝐄𝐍𝐒 Designed to fit most standard kitchen gaps between stove and counter, this 21-inch silicone gap filler provides a seamless, built-in look without trimming. Perfect as a stove gap cover, oven gap filler, or kitchen gap protector, it effectively covers the space between stove and countertop to prevent crumbs, spills, grease, and debris from falling into hard-to-clean gaps. Ideal for use as a stove side gap cover, counter gap filler, or appliance gap cover for gas or electric stoves. Flexible yet stable design adapts to uneven surfaces while staying securely in place.
Hardware Store Solutions: Backing Rods and Trim
Since you’re exploring hardware store solutions for that bed-to-wall gap, backing rods might be exactly the pro-level tool you’ve been looking for. They’re foam cylinders, designed to stuff deep into the void before you apply any professional caulking. This step is vital for a lasting seal. Before tackling the gap, ensure your bed is properly positioned against the headboard and at the correct sconce mounting height for optimal bedroom lighting.
Here’s your material selection: choose a closed-cell foam rod. Its density fills the space firmly. For a successful repair, be sure to insert backer rod deep into the gap before applying any sealant. Available diameters from 3/8″ to 2″ let you match your specific gap width. It compresses for a snug fit, creating the ideal base for your sealant. Just as proper base preparation is critical for a stable retaining wall, this foundation ensures your seal won’t fail. Once sealed, you can enhance the area with ambient LED strip lighting for a cozy atmosphere.
This method forces the caulk to form a proper, durable bond. Your next decision is whether to permanently seal it with caulk or simply hide it with trim.

Quality Construction: This gap filler is made from high-quality, weather-resistant materials, ensuring long-lasting durability and performance. It effectively seals medium gaps between surfaces, preventing drafts and dust from entering your home. Suitable for both indoor and outdoor use, it withstands various weather conditions, providing consistent protection and improved comfort.

EPDM CLOSED-CELL FOAM — DURABLE & NON-ABSORBENT Made from EPDM closed-cell foam that does not absorb water and maintains its elasticity over time. More reliable outdoors than ordinary PE backer rods, especially in concrete and exterior sealing applications.

Daily Caulking Necessity: meet your daily caulking needs with our backer rod; These foam backer rod roll provide a size of about 1 inch diameter x 50 ft length, an ideal solution for extensive caulking tasks; It is ample to meet your caulking needs, making you won't run out easily
Simple DIY Gap Fillers From Towels to Cardboard
If you’re puzzling over that awkward gap, you’re probably looking for a simple, non-permanent fix that won’t break the bank or your lease. Start with tri-fold cardboard; glue its seams to make a rigid panel. Now, cover it. Following a simple fabric selection guide, choose a towel or fabric you love. The key technique is to wrap the material tightly around the base.
Your towel color combinations can truly personalize the space. Iron the fabric first to avoid wrinkles. For a perfectly smooth finish, use the same folding techniques you would for storing a flat sheet in a compact bed, and consider a hospital-corner technique for sharp, professional edges on your covered panel. This method, similar to creating a compact, wrinkle‑free bundle for tight storage, ensures a neat, taut wrap. Wrap and staple it tightly around the cardboard’s front edges. Don’t stress about perfection on the back—it faces the wall.
Finally, mount your creation using Command strips. They hold securely but remove cleanly. You’ve built a custom, damage-free gap filler that’s as practical as it is stylish.
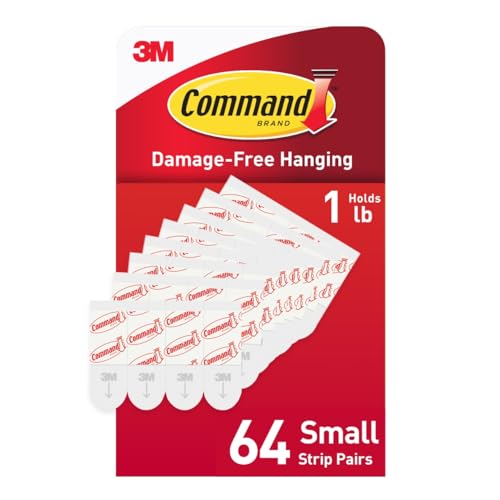
INCLUDES - 64 Indoor Small Replacement Strips

Gap Coverage: Covers the gap between the desks, nightstands, dressers, cabinets and the wall, enhancing workspace and home aesthetics

INCLUDES - 40 Indoor Large Replacement Strips
How to Measure Your Bed-Wall Gap Accurately
Nailing those measurements before you build or buy any filler is the secret to a perfect fit. You’re thinking, “Just use a tape measure,” but your measurement tools need calibration techniques for accuracy. Obviously, a metal tape won’t stretch like fabric. Outline your bed’s footprint on the floor with low-tack painter’s tape first. Measure from this outline to the wall at several points, as walls aren’t always straight. Record every number—width, length, and height differences—because ceilings can slope. This is especially crucial for bunk beds, as their overall length can exceed standard bed dimensions by several inches. When working with a bunk bed, always reference the manufacturer’s specifications for its total assembled height, as this affects clearance to both the wall and ceiling. Now, account for permanent fixtures like baseboards by measuring from their outer edge. Your final gap dimension is the smallest, consistent distance you find, ensuring your filler won’t jam or leave space. For specialized beds, it’s also critical to ensure any side rails are locked in place to prevent movement during measurement. When measuring for a loft bed, it’s equally important to verify you’ll have adequate headroom for sitting underneath it. Grab your tools and map that terrain.
Safety and Hygiene for Bedroom Gap Fillers
You’re probably wondering if filling that gap is just about looks or if there’s a real functional reason to do it. Safety is paramount, especially for bedridden individuals. In healthcare, high-density foam fillers prevent entrapment of limbs or the head in Zones 3 and 7. This directly impacts patient privacy by reducing distress and caregiver accessibility by creating a stable, safe working area. This principle of preventing entrapment is equally important in a child’s bedroom, especially when considering a bunk bed’s guardrail placement. Hygiene is equally critical. You need materials with wipe-clean, water-resistant covers for easy sanitization to control infection. This isn’t just for hospitals; it’s for any high-use environment demanding cleanliness and safety. This is a crucial consideration for a loft bed frame, where proper assembly and secure anchoring to the wall are foundational to its safety. Your takeaway: gap fillers serve indispensable protective functions, merging safety protocols with practical hygiene needs.
The Best Bed Gap Solutions for Renters
What to Put Between a Bed and a Wall?
The Best Bed Gap Solutions for Renters
How do you close that annoying gap without drilling or damaging a rental? You need non permanent fixings. Your best bet is a wedge pillow filler or a bed bridge pad. A wedge is a foam triangle designed specifically for gaps up to 5.5 inches. It slides in, provides neck support, and even has pockets for your phone. After unpacking, you should allow up to 12 hours for full expansion from its compressed state. A bridge pad, about 12 inches wide, perfectly connects two mattresses pushed together, creating a unified king bed. All these are temporary adaptations. You simply place them in the gap. They’re removable, require zero tools, and won’t modify your bed frame or walls. They’re designed for easy packing when you move. Your takeaway? Solve the gap problem with simple, portable tools you can remove anytime. Now, you just need to measure your gap to pick the right size.

Close The Gap: Our bed gap filler king is not only fills the gap between the headboard and mattress but it also solves the problem about items and pillows disappearing behind the bed. Close gap ranging from 0 to 8 inches. The best solution to stop losing regular bed pillow during sleep

【Close 0- 7 inch gap】:Our engineers optimized and upgraded the gap filler to a folding type according to our customers' needs, making it suitable for most beds. Roommate's Bed Gap Pillow is perfect for your headboard and mattress, preventing objects from slipping off the bed and reducing noise. When the Mattress Wedge Gap Filler becomes rectangular, it fills gaps from 0 to 7 inches wide. No more bending over to look under the bed for fallen objects!

AFTER-SALE SERVICE: After receiving the product, if you are not satisfied in any way, please contact us and we will provide you with satisfactory after-sales service to ensure a good shopping experience
Maintaining and Adjusting Your Gap Filler
Got your gap filler in place? Now, let’s keep it working perfectly. You’ll maintain it by vacuuming weekly and spot-cleaning spills promptly. Always air-dry it fully. Inspect monthly and replace the foam if it compresses over 20%. For adjustable beds, ensure the gap filler allows full independent movement of each mattress side.
Need a custom fit? Precise foam trimming with a serrated knife is your friend. If the height is off, stack thin layers for adjustment. For mattress anchoring, use non-slip pads underneath and secure the whole setup with your fitted sheet.
Check frame stability quarterly to prevent gaps from reappearing. Expect to replace foam every 1-2 years. Your next step? Just do a quick monthly check.