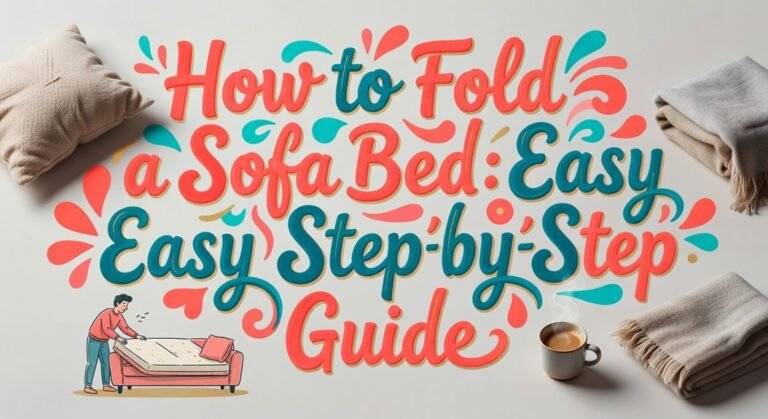
How to Make a Folding Bed: DIY Guide
You’re wondering how to build a folding bed yourself, which is perfect for custom space-saving. Start by planning a cabinet-concealed model, using sturdy 1×10 pine for a wall frame anchored solidly into studs. You’ll attach the bed base with heavy-duty hinges and a locking pin, then finish with paint or stain. Obviously, safety is key, so you’ll secure the mattress with straps and test everything thoroughly. Your path to a built-in bed becomes much clearer just ahead.
Pick and Plan Your Hidden Bed Design
Obviously, you’re figuring out which hidden bed design actually fits your space and lifestyle, and that’s where we start. You’ve got classic cabinet-concealed beds, blending seamlessly for $1,000-$3,000, or bunk bed models maximizing kid capacity. Desk-integrated ones are ideal for your remote work setup, transforming instantly, and designs like the Clay Penelopey Desk Murphy Bed allow the work surface to stay perfectly level as the bed folds down. Your final choice should also consider aesthetic integration to ensure the unit complements your existing small‑room décor. Now, your safety precautions are paramount. That bunk design needs robust safety barriers. For ceiling beds, you’ll rely on a patented, smooth mechanism. Before any assembly, take accurate space measurements to ensure the unit operates freely when folded down.
You’ll also weigh material alternatives. That’s about choosing durable woods or metals that support the hidden mechanics. It affects both cost and longevity. Your final pick balances your room’s function with these practical factors. A successful build also requires detailed precise measurements and layout planning from the very beginning. All right, you’ve narrowed your design vision. Next, you’ll translate that plan into a concrete list of what you need to build it.
Create Your Shopping List, Tools, and Budget
Now that you’ve settled on a design, you face the next big question: what exactly do you need to actually build it?
What’s the complete shopping list?
Compile everything: structural pipes, M8 bolts, specific hinges, and lumber like 1″x10″ pine. Don’t forget hardware like drawer slides or piston kits, which can cost £30 per set. Your project timeline depends on securing these items first. It is crucial to select the correct Murphy bed hardware kit, which includes the essential wall-mount brackets and lifting mechanism. For a simpler build, you can start with a pre-made IKEA wardrobe kit as your core cabinet structure.
Which tools are absolutely necessary?
You’ll need a welding set, angle grinder, and a precise saw. Factor these into your budget and safety precautions—proper gear is non-negotiable. Also, account for materials to finish the exterior with trim or cabinetry.
Establishing this list and budget upfront prevents mid-build stalls. Next, you’ll transform these materials into precise parts.

🛏️【Complete Queen-Vertical Murphy Bed Kit】Finished size reference: 87-1/8-inch H x 65-7/8- inch W x 15-7/8- inch D (closed) x 87 inches deep (open).A complete Murphy bed queen hardware kit can easily mount your cabinet folding bed on the wall and save space for your guest room & living room.

TIME TESTED: Our kits have stood the test of time for over 35 years. If you’re going to build a high-quality murphy bed, you want it to last a lifetime. American-made steel, labor, and support are behind each kit.

𝐂𝐎𝐌𝐏𝐋𝐄𝐓𝐄 𝐌𝐔𝐑𝐏𝐇𝐘 𝐁𝐄𝐃 𝐇𝐀𝐑𝐃𝐖𝐀𝐑𝐄 𝐒𝐘𝐒𝐓𝐄𝐌 — WHAT’S IN THE KIT — Includes gas piston lift system (smooth open/close rated for daily use), patented 2-in-1 auto-locking stainless steel pivot plates, heavy-duty square tube folding legs, quick-release mattress retention strap, all mounting hardware and fasteners, plus 3 fully illustrated guidebooks (Cut List Guide, Construction Guide, Assembly Handbook). No separate hardware store runs needed for the mechanical components.
Cut Your Wood Pieces to the Right Dimensions
Carefully transfer every measurement to your wood. Double-check each dimension before you make a cut. Accurate cuts now prevent huge headaches during assembly, ensuring all the parts close correctly and contribute to the overall bed frame stability. A well-made mattress platform is the foundation of a comfortable and safe loft bed. Before you begin assembly, it’s wise to follow a final safety inspection of the structure. Remember, the finished bed box has a compact form factor of 16.5 inches deep. Now you’re ready to start joining these pieces.

LONG LASTING DURABLE EDGE GRAIN ACACIA: Our Acacia Edge Grain Cutting Boards are built of durable solid construction, this construction type is known to be extremely durable, to withstand heavy-duty chopping, and is highly desired for its 'self-healing' properties. Each knife cut goes between the wood fibers, rather than cutting through them. Each butcher block cutting board you receive is unique that has unique natural color and pattern.
【Sustainable American Hardwood】Crafted from sustainable American cherry wood, this edge grain cutting board instantly elevates your kitchen's style. It's not only elegant but also heavy-duty, resistant to scratches, and warping

PREMIUM SOLID WOOD WITH CHECKERED DESIGN: Crafted from premium walnut and rubber wood, this checkered cutting board showcases a striking checkerboard pattern that adds a warm and stylish touch to any kitchen. With its thick 1.2-inch butcher block construction, this wood cutting board offers excellent durability and stability, making everyday food prep both comfortable and enjoyable.
Build the Sturdy Wall Frame for Your Folding Bed
Picture all those cut pieces—a pile of potential—and the first thing to tackle is the rigid box that anchors everything to the wall. Assemble your 1×10 pine boards into a rectangle, screwing on 2″ corner braces at each joint. This is one of your key frame stiffness strategies. You’ll then add 1×4 cross-supports inside it. These boards are indispensable for your wall attachment methods. Pre-drilling holes prevents the pine wood from splitting when you drive in the screws. To ensure a secure installation, using a stud finder will help you locate the solid wood behind your drywall. Always double-check your measurements against the bed mechanism specifications before final assembly, and consult your local retailer for information on specific load capacity requirements to ensure your DIY build meets safety standards.
Now, before you secure it permanently, test fit your mattress inside the frame. You want a little extra space. Elevate the whole box slightly off the floor with scrap wood spacers; this reduces stress on future hinges.
Finally, position the frame. Align those cross-supports directly with your wall studs. Screw through them with construction screws for a rock-solid hold. Your sturdy anchor is complete. Next, you’ll build the platform that folds.

Natural wood color

EXQUISITE DESIGN:These natural 8x10 picture frame with mat exhibit natural wood color and curved Bevel. Their smooth wood grain lines can almost complement any decorative styles. Whether it's modern, minimalist or idyllic, these Natural Wood Picture Frame 8x10 will add a touch of natural beauty to your home.

Versatile Craft Canvas: Design and create unique artwork on these 8x10 craft wood canvas panels using watercolor, oil, acrylic, casein, impasto, or tempera paint, transforming blank wooden signs into personalized masterpieces
Build the Bed Base and Rear Panel
Next, you’ll make it all fold. Reinforce the folding joints with sturdy hinges and support beams to ensure durability and safe operation. The hinged-leg design, famously patented in the 1860s, has been a core mechanism for efficient folding ever since. When choosing your hinges, prioritize those that complement the frame durability recommended for a long-lasting folding bed.
Attach the Hinges and Locking Mechanism
All right, with the bed base and rear panel built, you’re probably wondering how this flat assembly actually folds up neatly. You’ll need to modify the bed hinges first. Remove their internal springs with a pin, backing out the tensioning screw. When installing them, pre-drill using a 3/8″ Forstner bit, clamping a wood block behind to prevent blowout. Align them perfectly using a temporary partial frame.
Insert the machine screws through the mounting plates and thread the nuts. Here’s the thing about hinge torque: tighten all four nuts evenly until the screw heads are flush, but stop. Over-tightening will bind the mechanism. For long-term reliability, prioritize durable hardware that can withstand repeated folding cycles, a key feature in commercial models. Now, for lock types, this project uses a simple plunger pin. Drill a 3/4″ hole for the lock body and a 1/2″ hole for its receiver cap, hammering the cap lightly into the bed frame. This lock mechanism functions to securely prevent the bed frame from accidentally opening. Before final use, conduct a thorough safety inspection to ensure all components are secure and the mechanism operates correctly. Secure the lock with its provided screws. To ensure your project complements your interior, consider the design aesthetics of your wall-mounted bed, such as choosing hardware finishes that match your room’s décor.
Finally, test the fold. The pin should slide smoothly, locking the bed securely both open and closed.
Mount Your DIY Folding Bed to the Wall
Obviously, you’ve got your bed built and folding, so you’ll naturally wonder how to actually secure it to the wall safely. Your cabinet must anchor to studs for structural integrity. Find at least three with a stud finder—they’re typically spaced every 16 inches. Here’s the thing: precise fastener spacing into those studs is critical. Now, lift the frame against the wall with a helper. Drill your pilot holes, ensuring they hit the stud centers. Your lag screw selection matters; 3-inch screws through washers are standard. Always consult the product manual to confirm that your installation will support the total weight of occupants and bedding. Fasten the top header first for proper weight distribution. Tighten everything securely. That solid connection handles all the stress when the bed’s in use. Before finalizing your installation, verify the wall’s load capacity meets the mechanism’s demands. Next, you’ll test its operation.

Quantity & Size: You will get 7pcs 3/8 x 3 inch Hex lag screws, 7pcs flat washers, a 9/16" Hex Socket Driver Bit. Handy Screw Bolt Kit for your wooden projects

Quantity & Size: You will get 1lb box (approx. 38pcs screws) #14 x 3" long lag screws concstruction wood screws, black, a T30 star bit

DIMENSIONS & SUPERIOR STRENGTH: Thread Diameter 0.25" - Head Diameter 0.55" - Length 3" - Use with T30 Star Bit. Crafted from heat treated steel, LIONMAX heavy duty lag screws offer unmatched strength and reliability for long-lasting woodworking projects
Finish and Paint Your DIY Bed
Now, with your bed frame mounted securely, you’re probably wondering how to get that sleek, finished look. First, decide between paint or stain. For paint, cover plywood or MDF with a primer like Bullseye 123 first. This guarantees your topcoat, perhaps a durable enamel, adheres evenly. A key painting process is to always wet your brush before starting for better application and easier cleanup.
Your stain selection depends on the wood. Something like oak? Use a pre-stain conditioner first; it prevents a blotchy finish. Your final step is the protective topcoat. A clear varnish application is essential. It seals your paint or stain, guarding against daily wear. Apply two thin coats for best protection, sanding lightly between them for smoothness. This final layer transforms your project from raw wood to a polished piece, ready for your unique style.
Secure the Mattress and Test Your Folding Bed
You’ve built a sturdy, great-looking bed, but you’re wondering how you’re actually supposed to *use* it as a folding bed, right? Your securing strategies start with ratchet straps. Use at least two, cinching them tight and flat across the folded mattress. Crisscross them for reinforcement. Now, for stability verification, you test it. Push on the secured mattress to check for shifting. Perform a shake test to guarantee it won’t unfold. Inspect strap tightness, adjusting any loose sections. Finally, verify no damage from pressure points. Remember that a coil mattress should not be folded long-term, so only secure it this way when the bed is in active use. Obviously, you want a bed that holds its shape perfectly. Secure it well, test it thoroughly, and you’ll have a folding bed ready for anything.